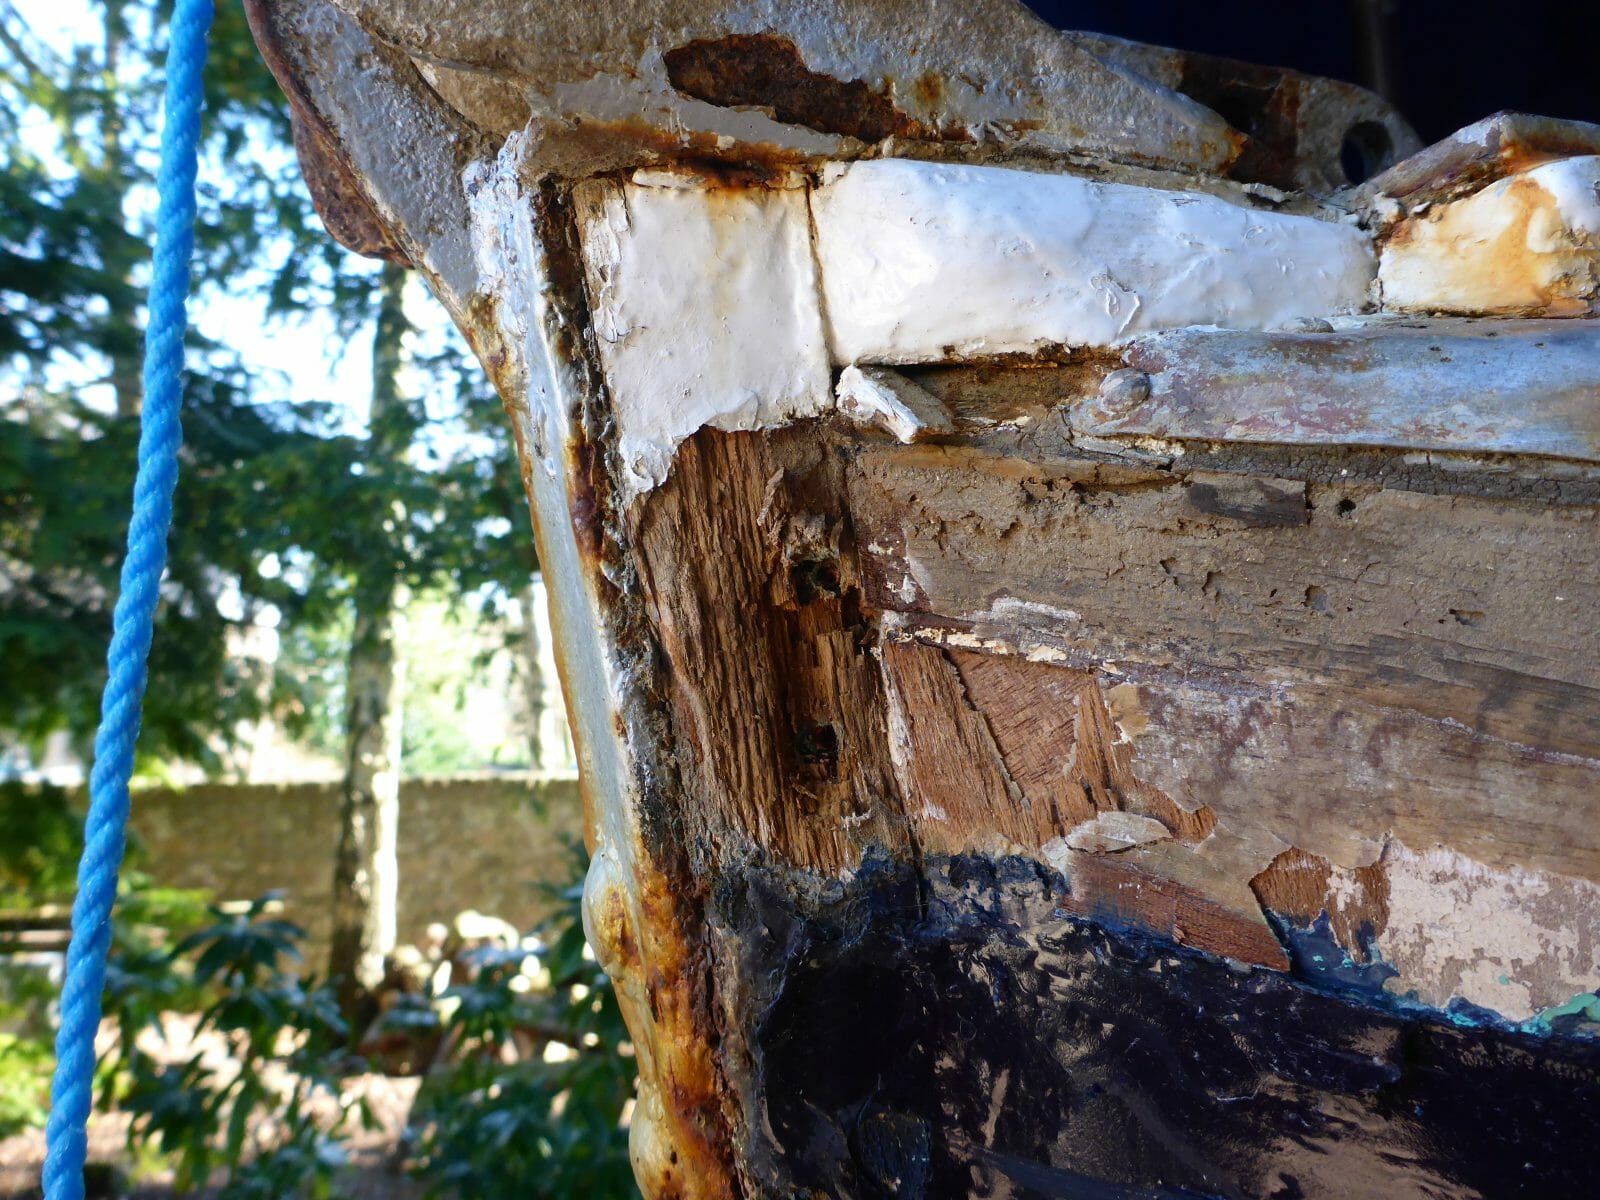
Work has continued on repairing the bow area of Bluster. The deck area had some rot wherever it had been penetrated by a screw or bolt, allowing water to get into the end grain of the laminates. The king plank was full of holes from alterations to the stem fitting, but was not rotten, so the holes were filled with new wood epoxied in. The false stem was rotten at the top and the stem was rotten where the bolts for the stem fitting penetrated it.
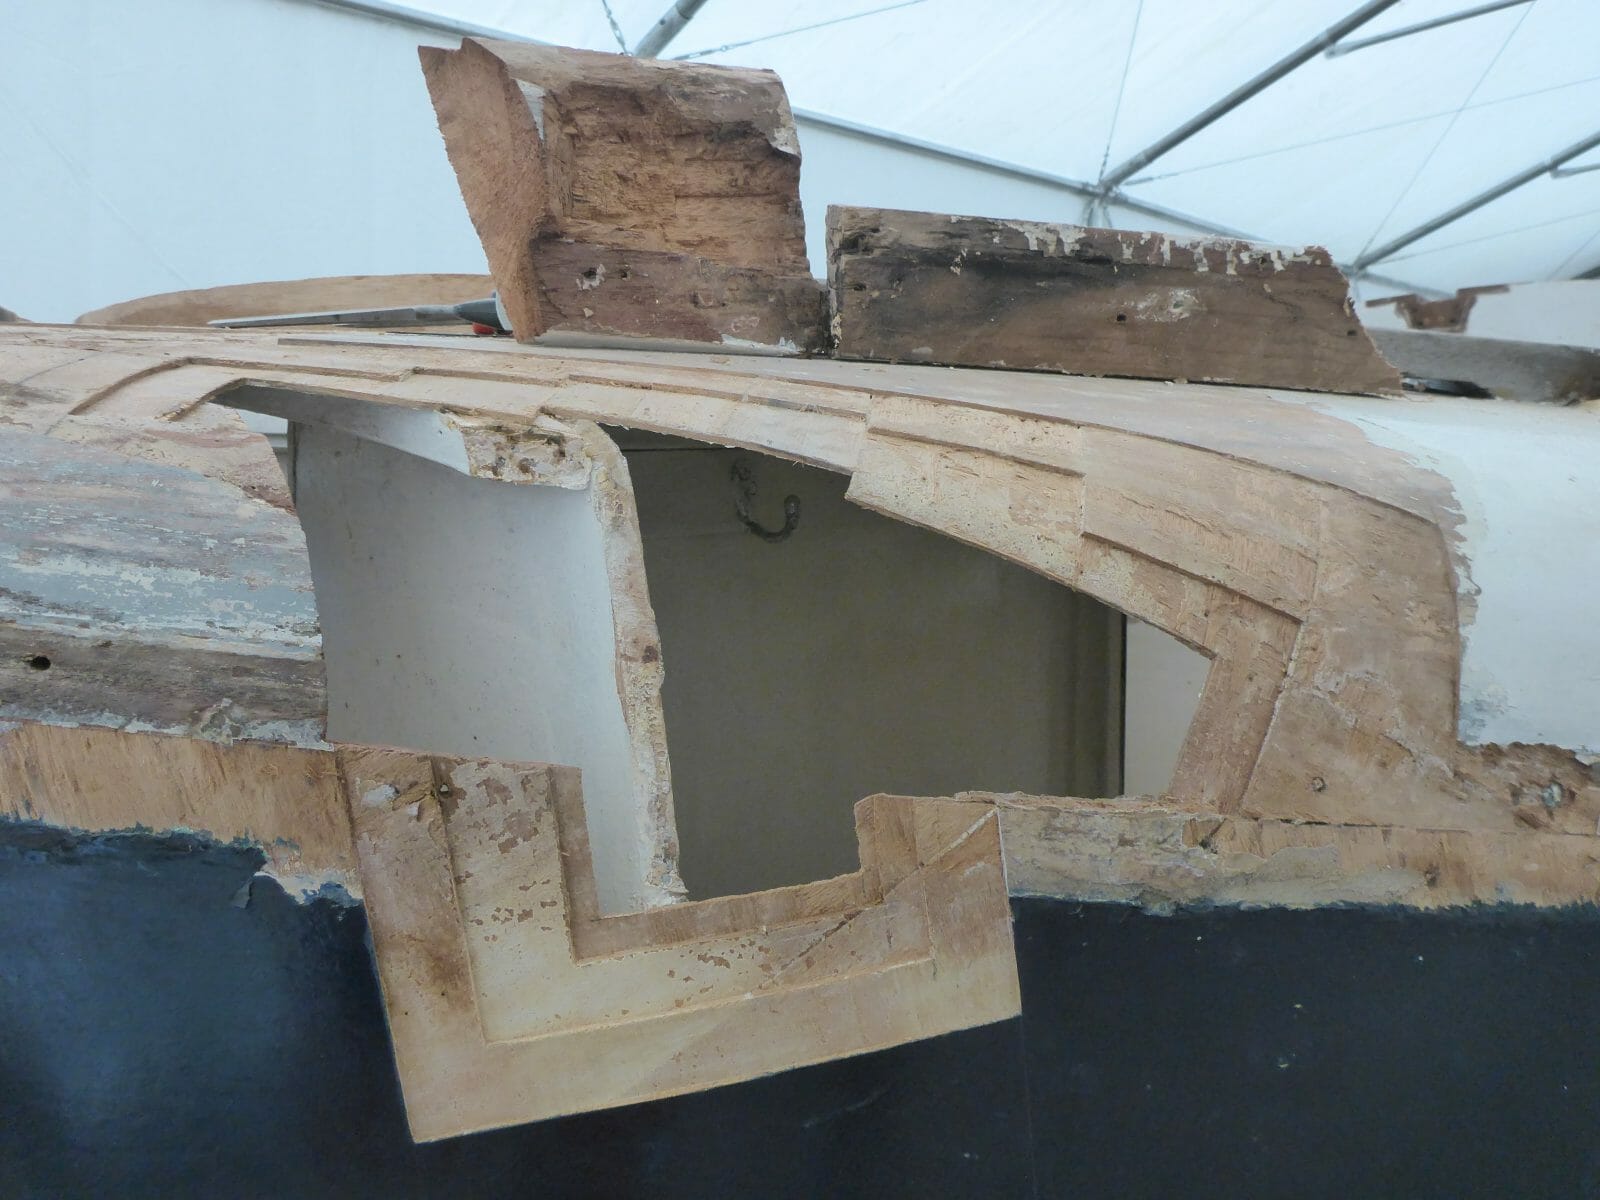
The stringers at the hull-deck join was very soft where they joined the more solid extensions of these at the bow, and there were several soft areas in the bow section too. These have all now been repaired by scarfing in new wood; the pictures and captions tell the story.
The false stem still needs to be replace together with the deck mounting piece for the stem fitting, and the whole lot needs fairing. In future, when drilling holes in the deck or stem, I will try and seal the end-grain with epoxy before putting the bolts in (with mastic). I will not epoxy the bolts in case I want to get them out again!
There was also some damage just below the waterline, only apparent on the inside where the laminations were sprung. Upon further investigation, it was discovered that all four laminations were damaged. The cause of this is unknown, but must have been caused by hitting a floating object or possibly by the anchor hanging loose in a seaway?
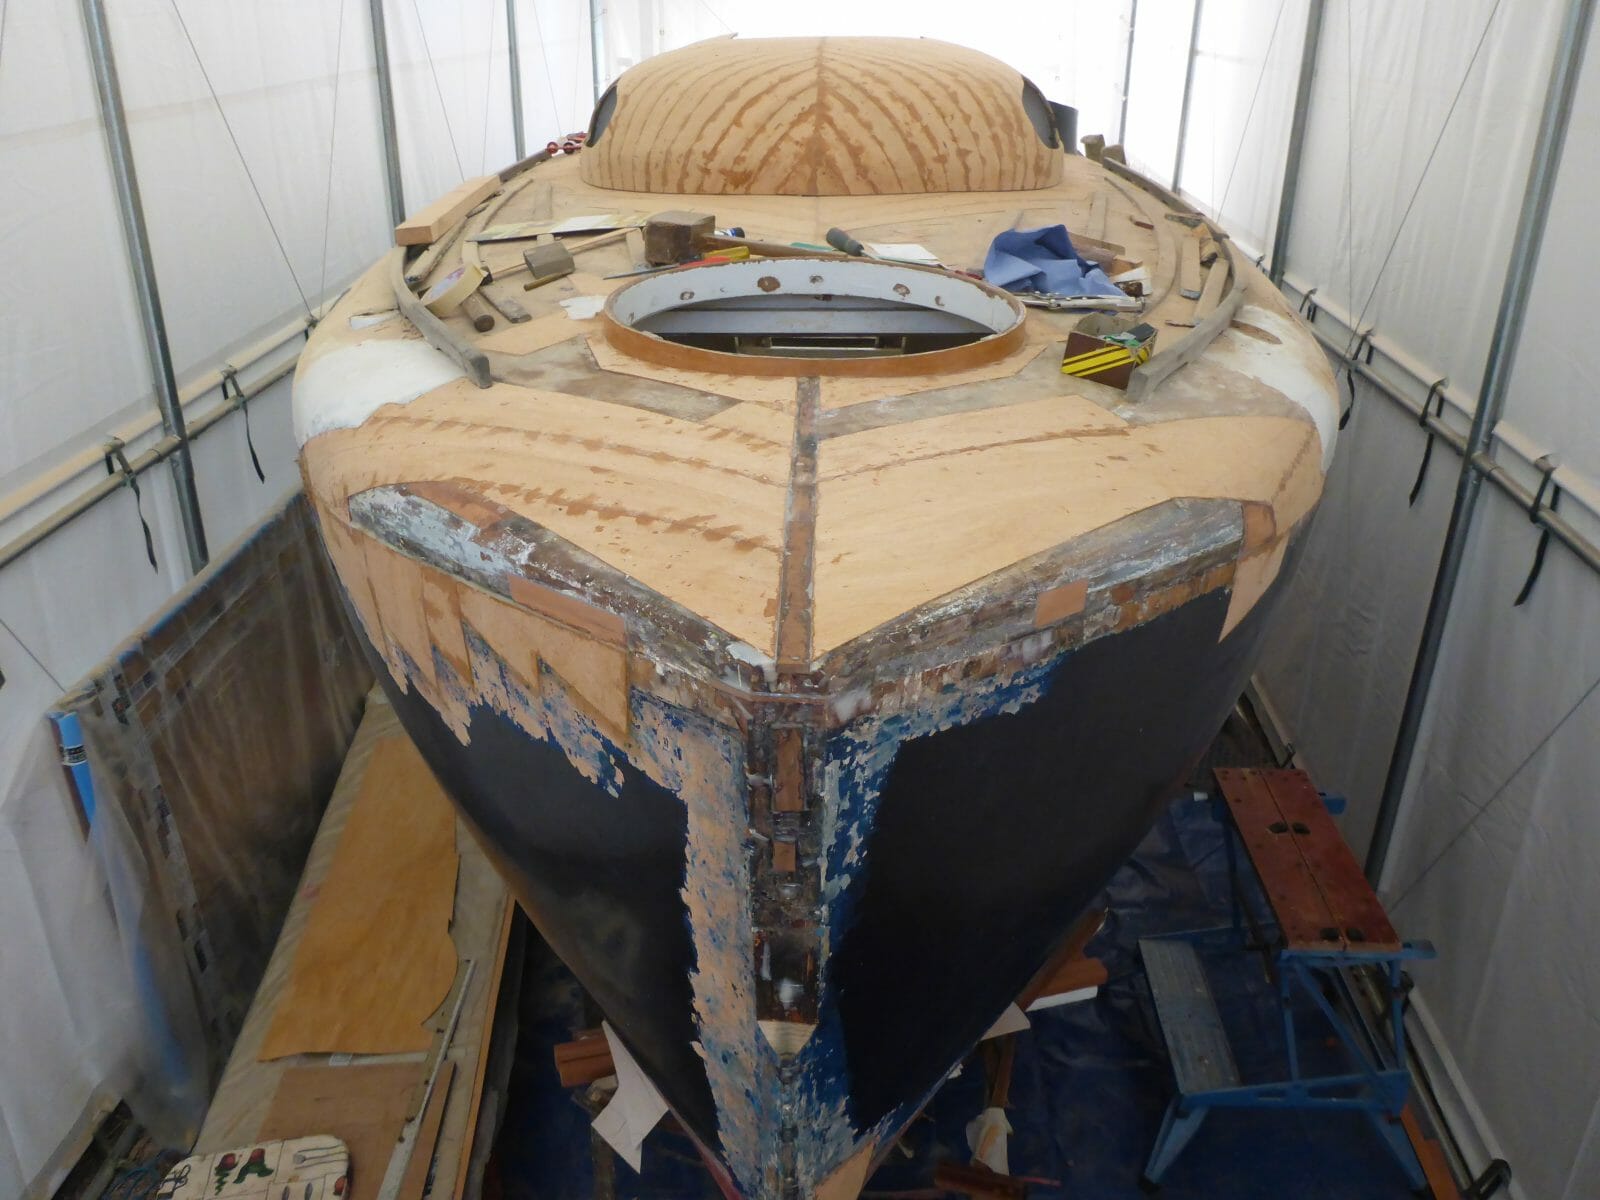
The cover image shows Bluster in her present state. The coachroof has been repaired and had an additional laminate layer added on the outside to replace some of the wood sanded off over the years. It has not yet been fixed back on; the sections of “quarter round” are being shaped and fabricated for this. The companionway hatch and runners will be rebuilt and the grab rails replaced.

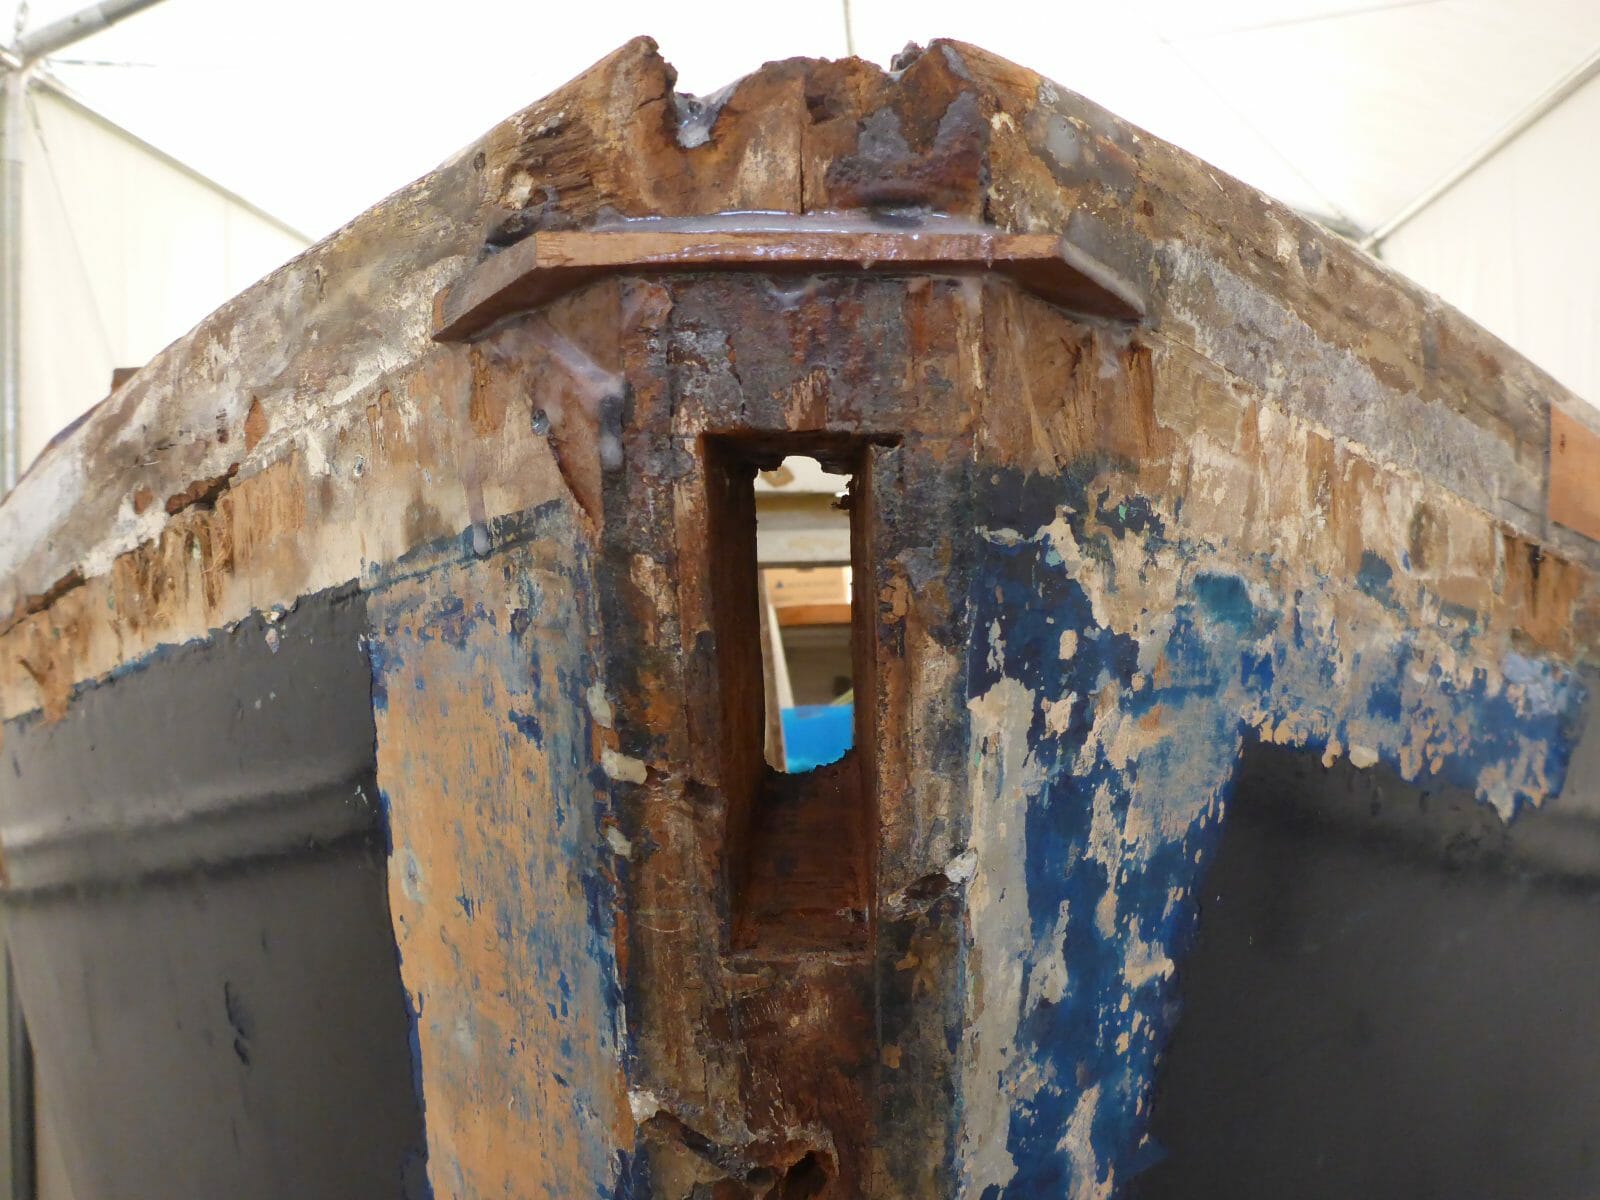
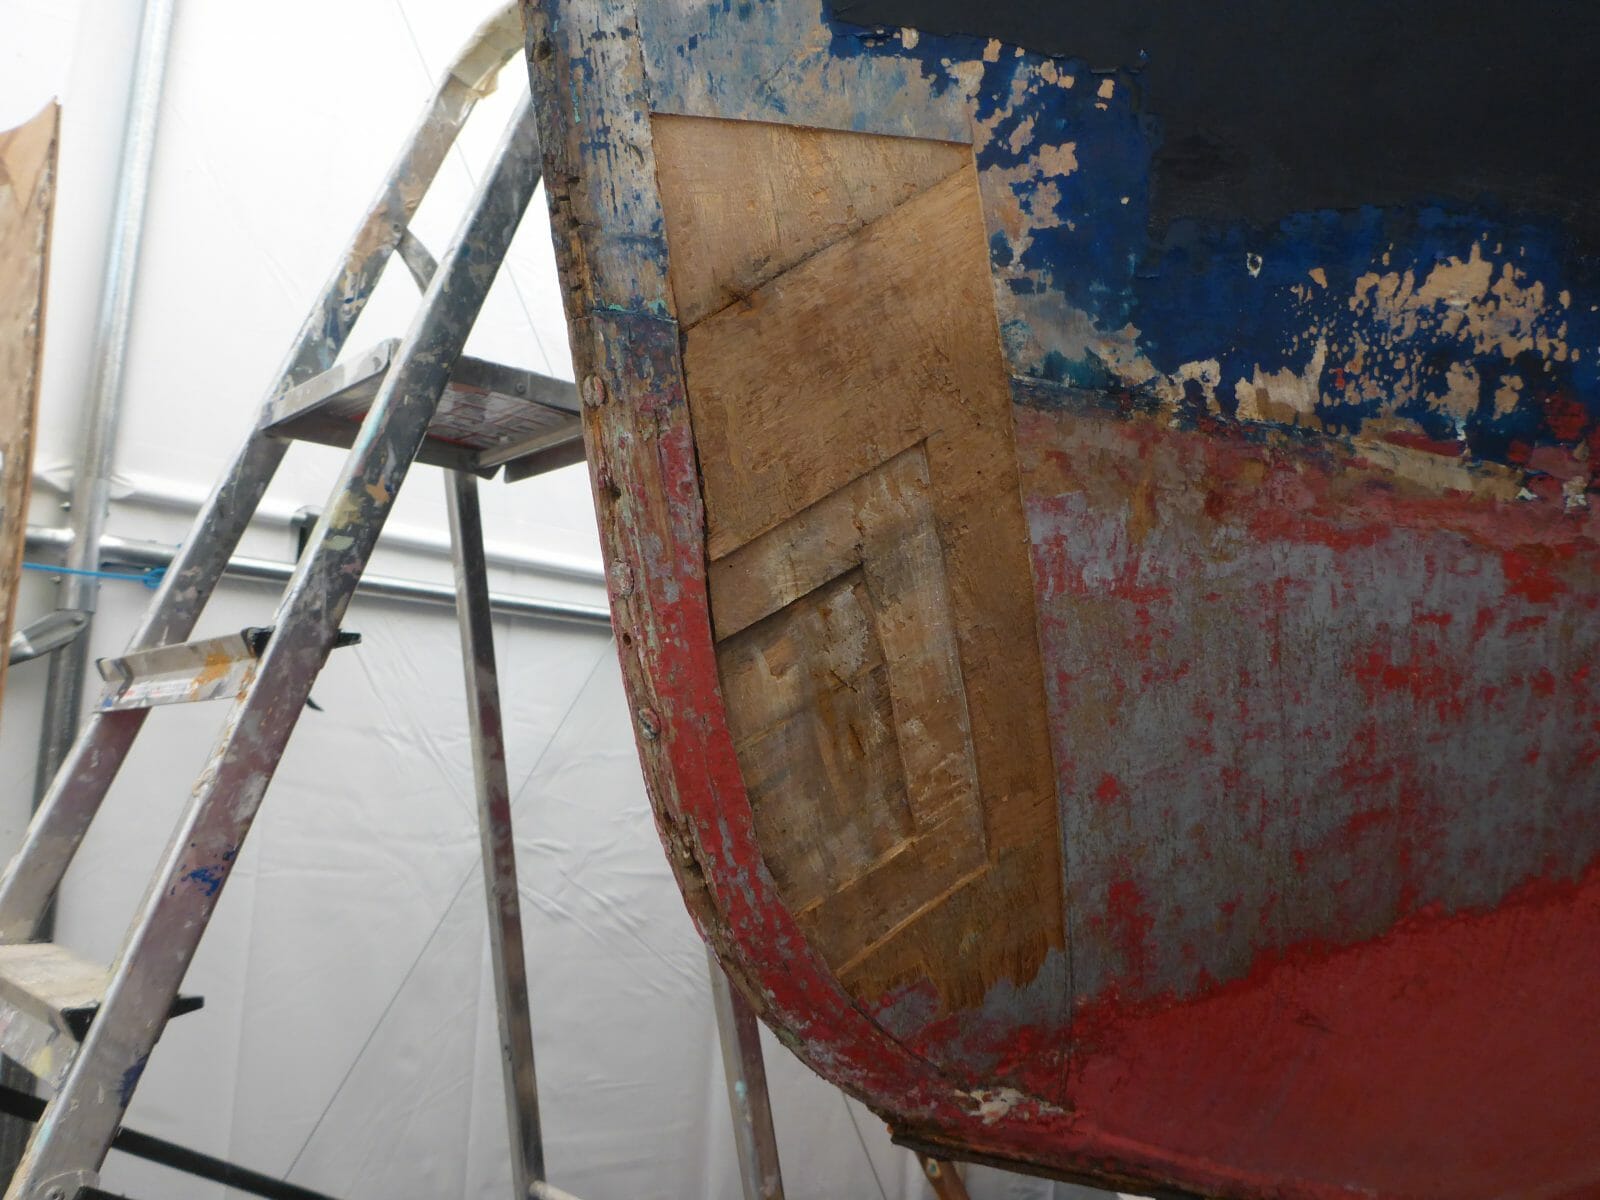
Rot in false stem
There was a lot of very soft wood in the false stem around the stem fitting and bolt holes.
Under stem head fitting-3f600ef9
There was also some rot under the stem head fitting and around all screw and bolt holes.
King plank at bow
More holes than a swiss cheese, but no rot.
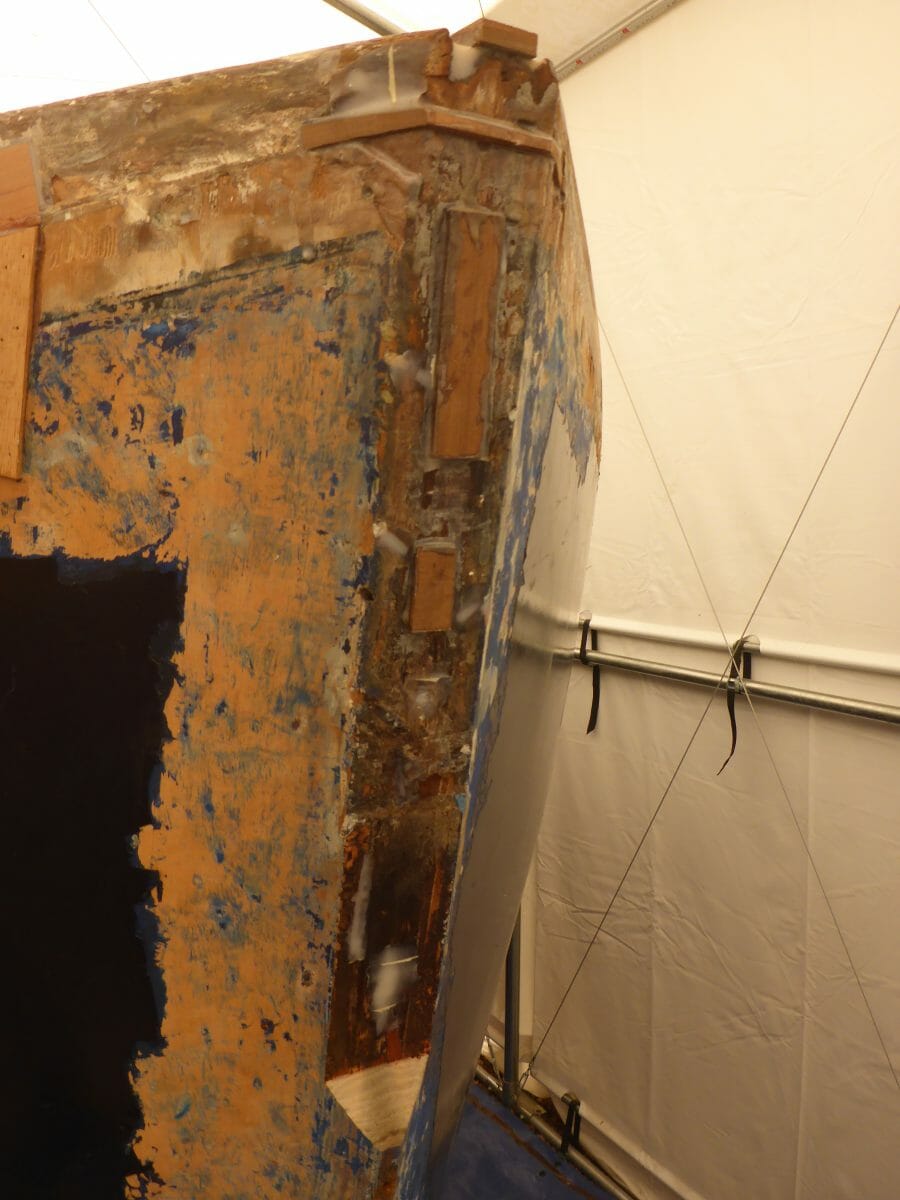
Port bow
soft wood cut out of the port bow where the deck to hull joining stringer meets the thicker section at the bow.
Port bow under repair
The stringers sections in the port bow replaced ready for the deck to be put back.
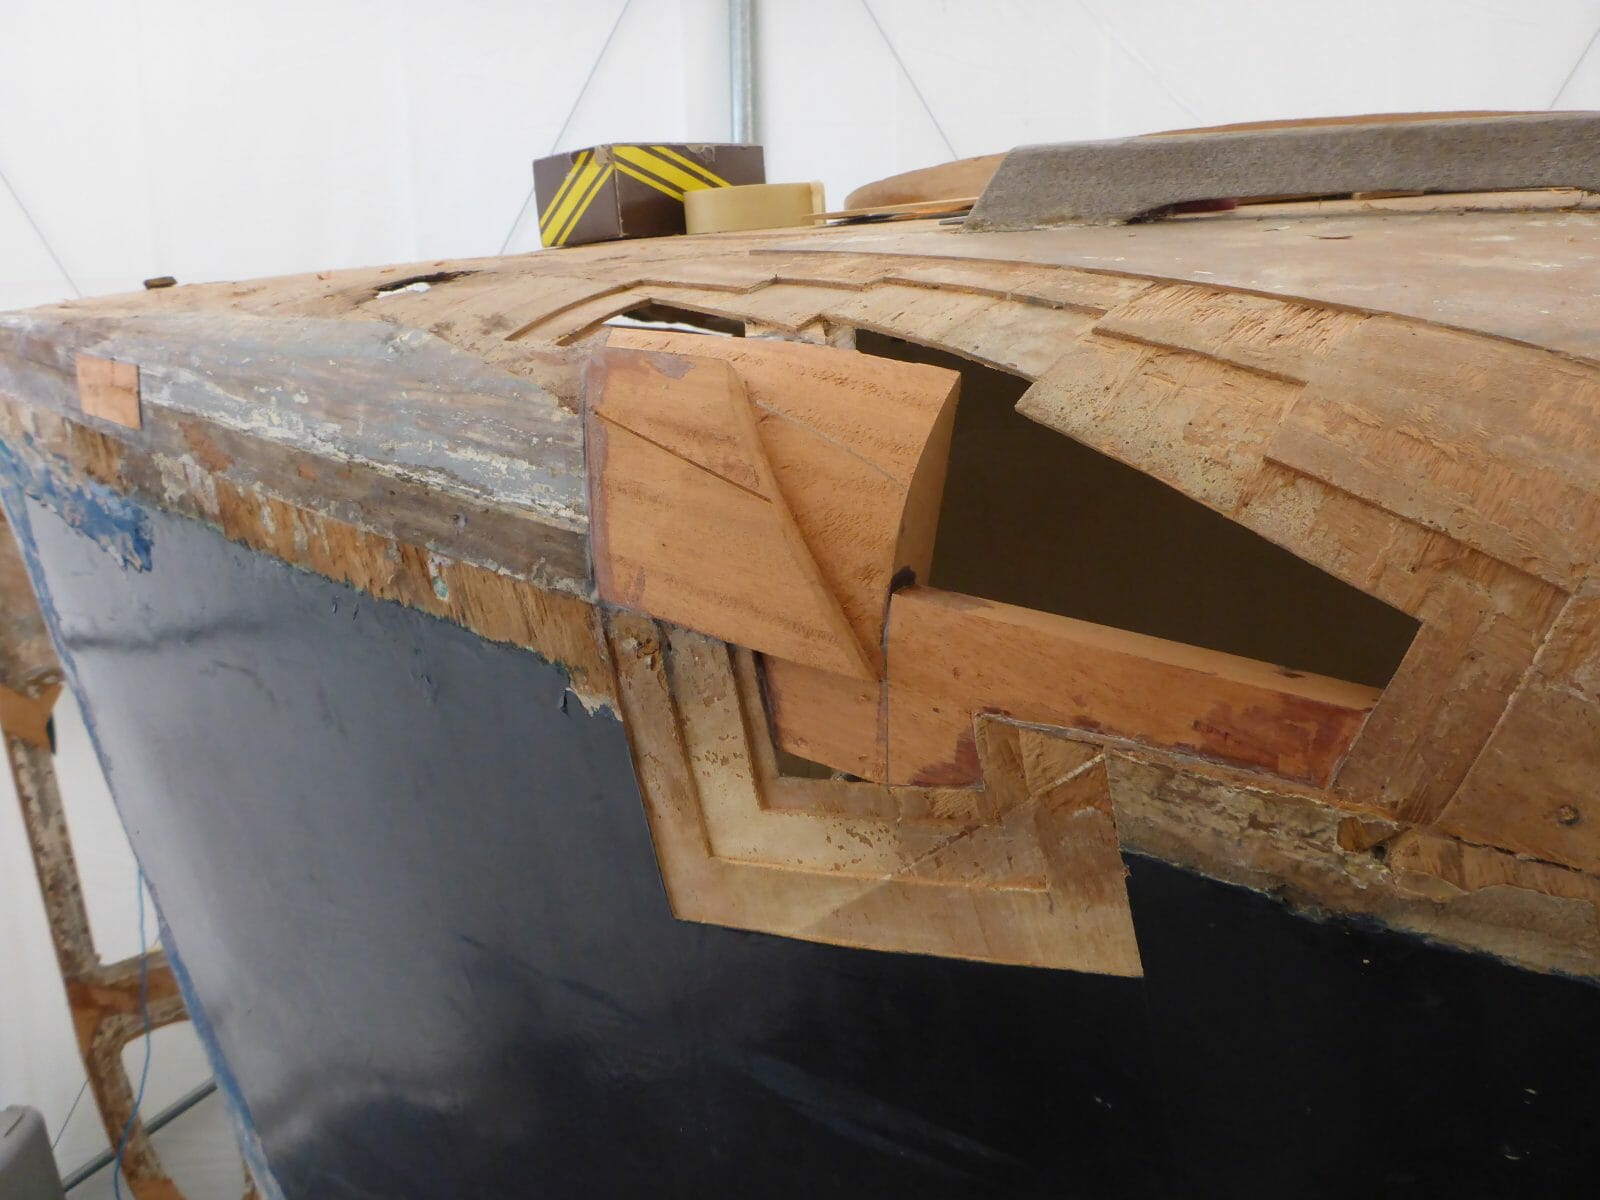
Starboard bow
Section of soft wood cut out of the starboard bow with replacement scarfed in.
Starboard bow
Sections of the stringers on the starboard bow had also to be renewed.
Starboard bow under repair
Laminations going back on to the hull over the repaired stringer.
The stem
After removing the false stem, the soft wood in the stem around the bolt holes was cut out ready for scarfing in new wood.
The stem
New wood scarfed into the stem.
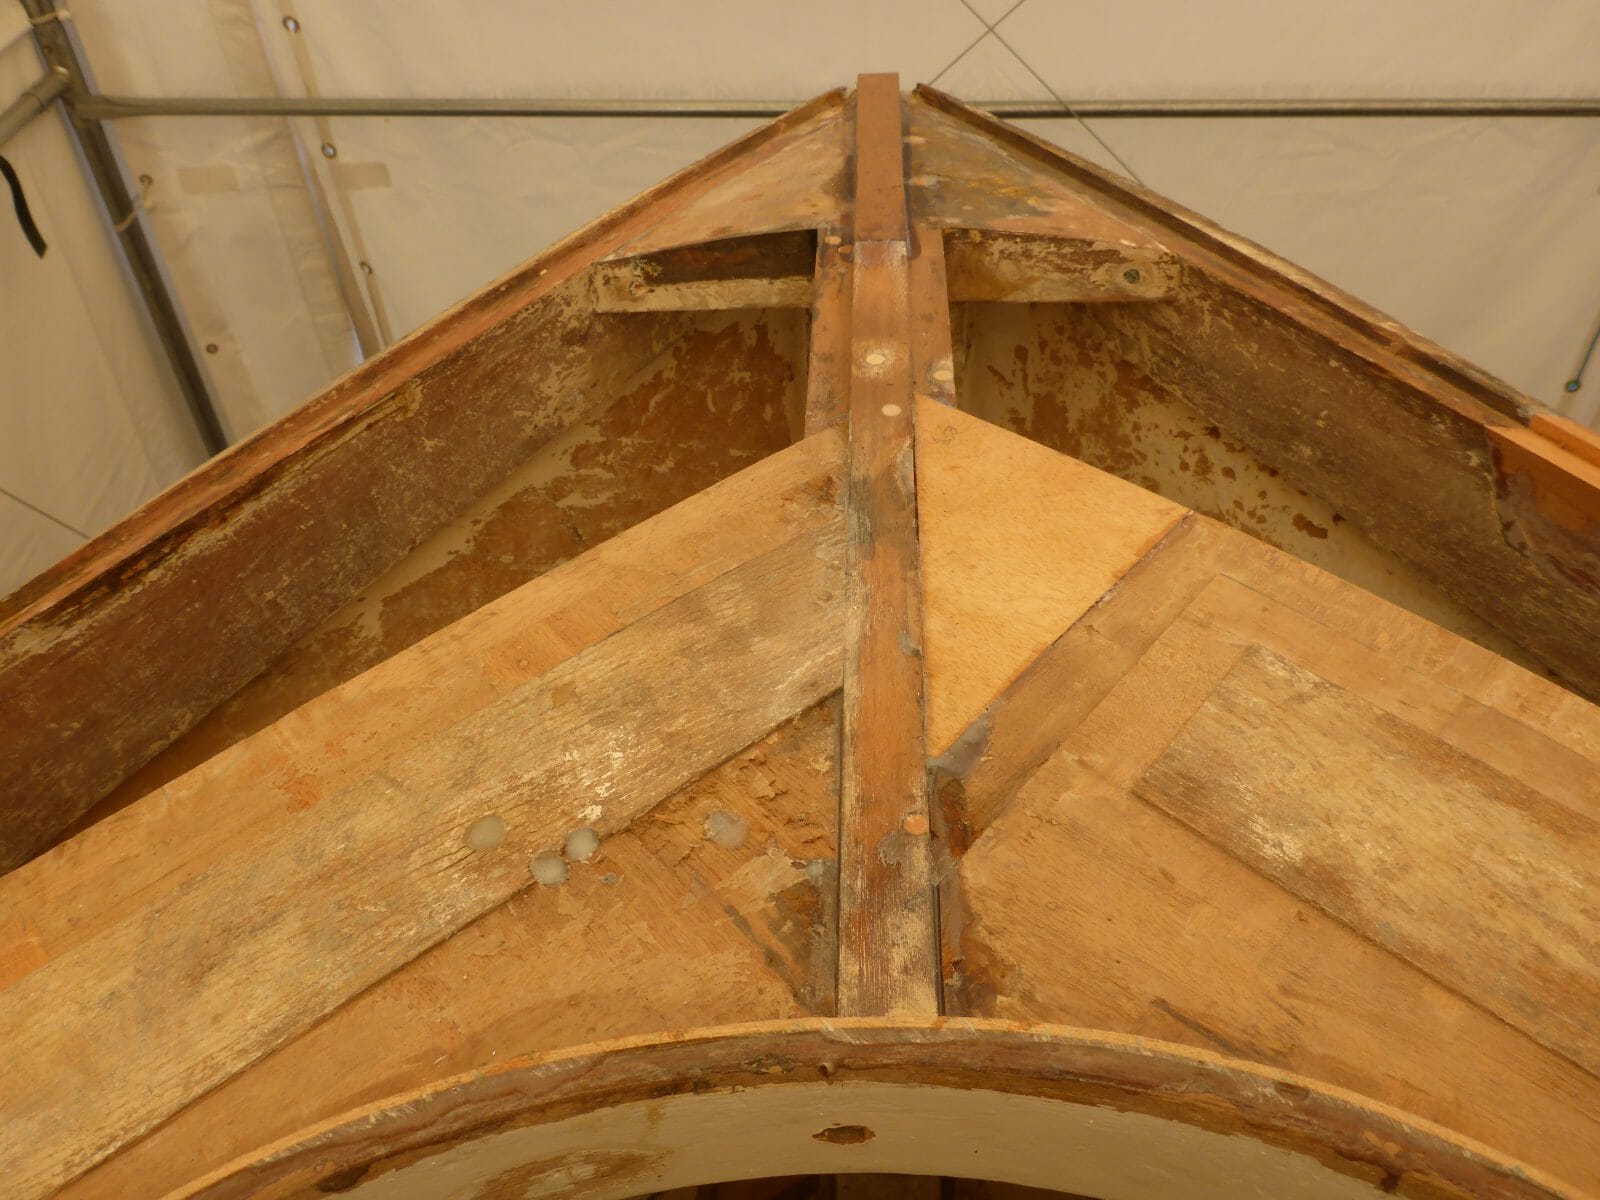
Deck at bow with fittings removed
The decision was taken to cut out and replace much of this section of deck rather than fill up all the holes.
Rorececk ready for replacement
With the king plank back in place, the foredeck is ready for replacement.
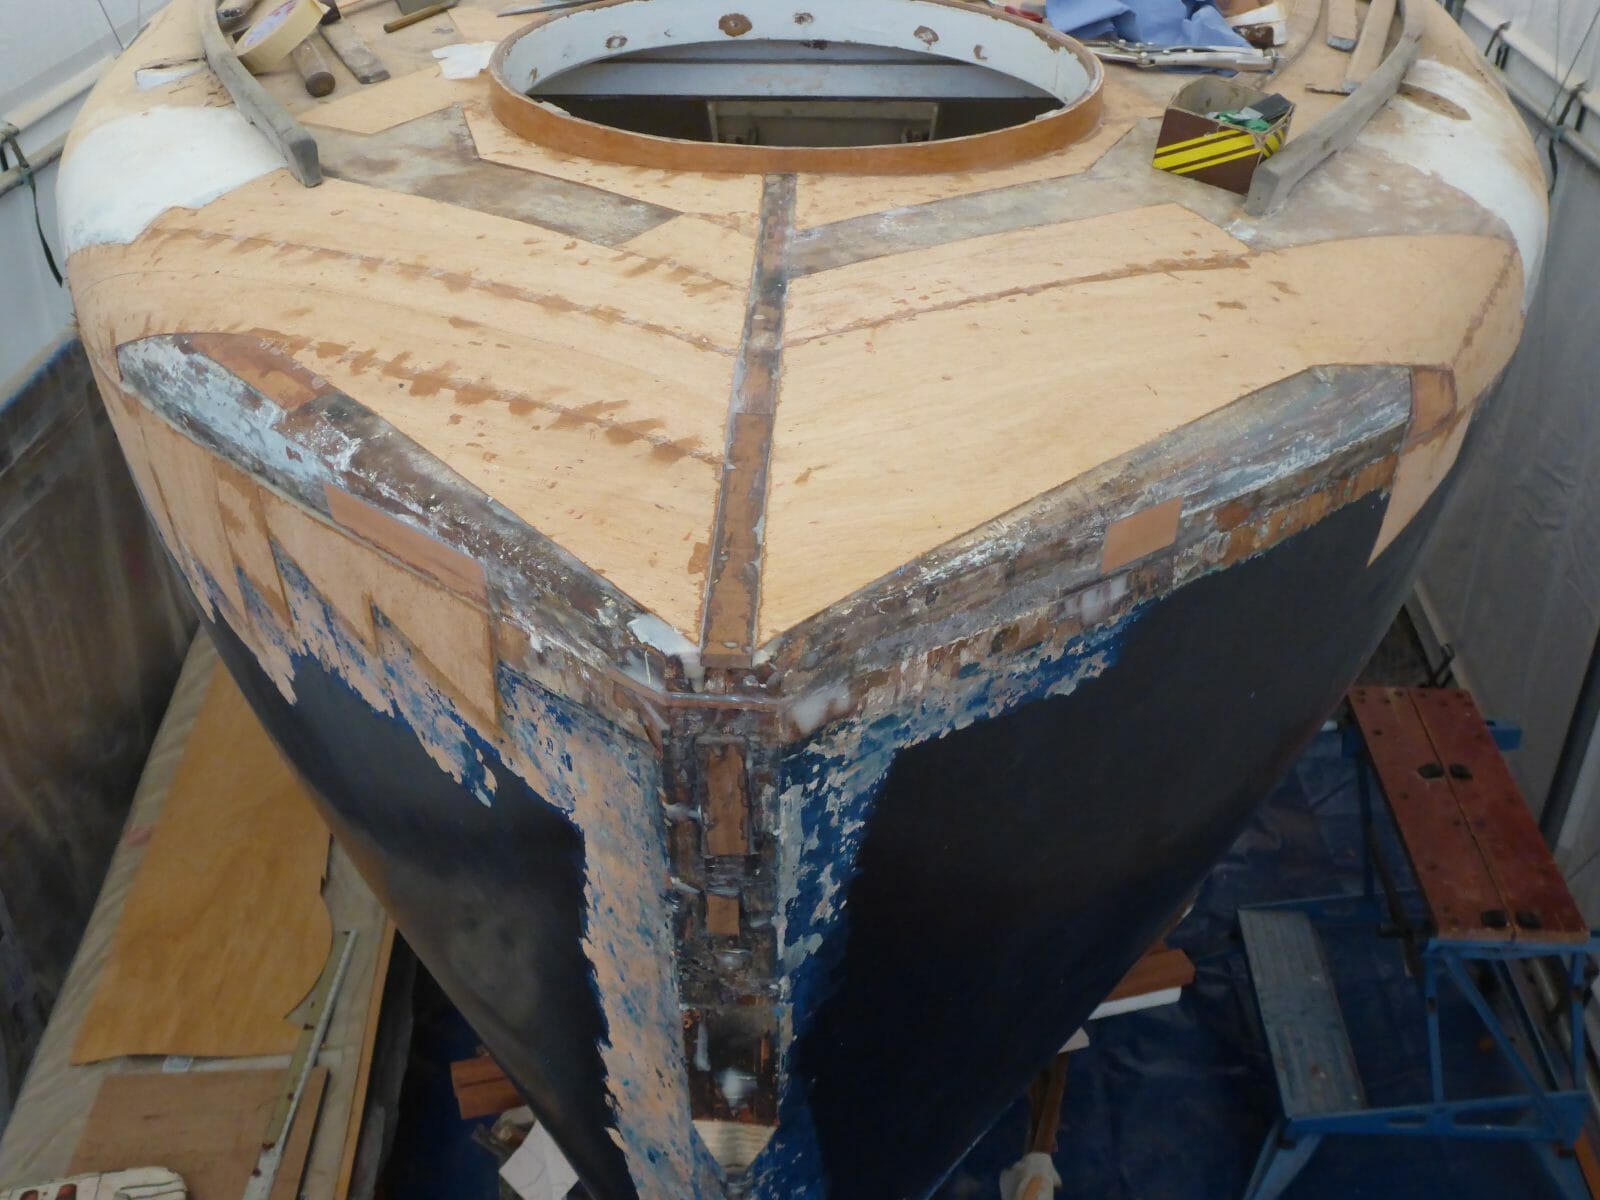
Bow reinforcement
Prior to replacing the deck, one inch Sapelle planks were shaped and inserted as under-deck reinforcement for fittings such as cleats, fairleads and pulpit.
The bow deck repaired
The deck back in place ready for fairing.
Bow damage at the waterline
All four layers of laminate were sprung on the port bow just below the waterline; from an anchor swinging in a seaway?
inside the port bow
Starting the repair of the sprung laminations on the port bow from the inside.- I confirm that I have rights to the material uploaded above and agree that the AOA may use this material on the website as defined in the website Terms and Conditions (see link in footer)


Thanks all for your encouraging messages. I am currently working on the “quarter round” joining the front part of the bubble to the deck. I have laminated mahogany to get the basic shape, but trimming it is tedious. It has multiple curves in every dimension imaginable, plus those induced by my re-laying of the deck without the benefit of Fairy moulds!
Looks excellent!
Jane certainly would be proud. And it is great to have the photos and comments as you go – preserving Bluster’s history and it will act as a great inspiration and guide for those that follow you.
Cheers
Nick
Fantastic work your mum should be proud