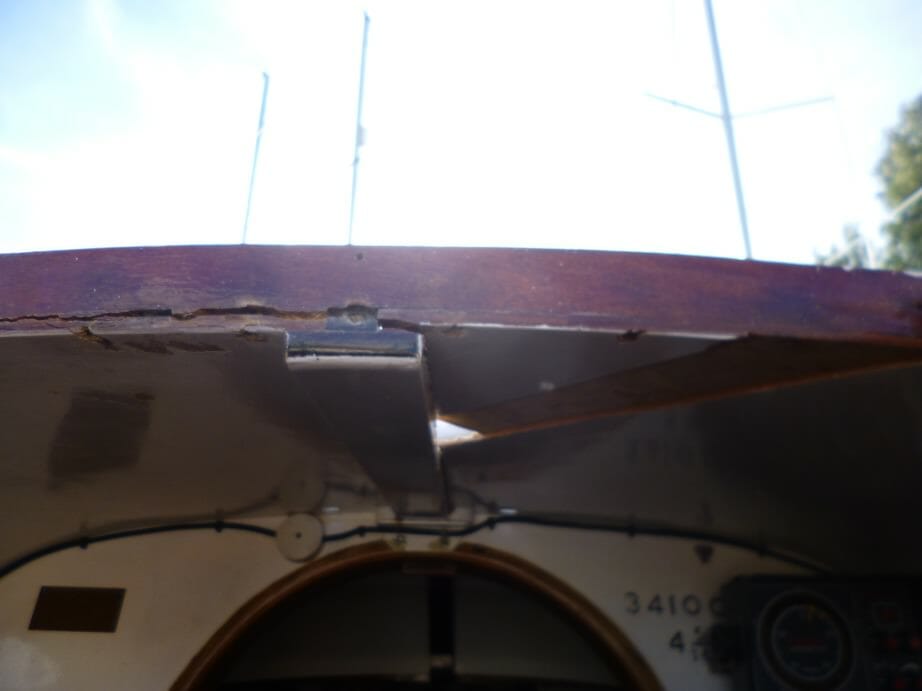
As you may remember I managed to damage the bubble just forward of the hatch. After damaging and repairing the hatch itself. This repair scared me far more as a hash job here would be a significant scar on my self confidence.
What had happened is that I had lowered the mast going a bridge and must have over estimated the height of the bridge. I am not sure what would be worse or what I had in mind, damage the mast on the bridge or drop the mast thinking the yoke would catch it. Anyway the coach roof did its best to catch it at the cost of splitting the joint, poking a hole in one side and splitting the laminate on the port side.
In this discussion I will go through how I repaired it….

Finally Last week (April) I booked a couple of days off and went down by myself. I can sleep on the boat and there is a loo. Showers involve a quick dip in the sea and a cold beach shower. But this means I don’t need to pay for accommodation.
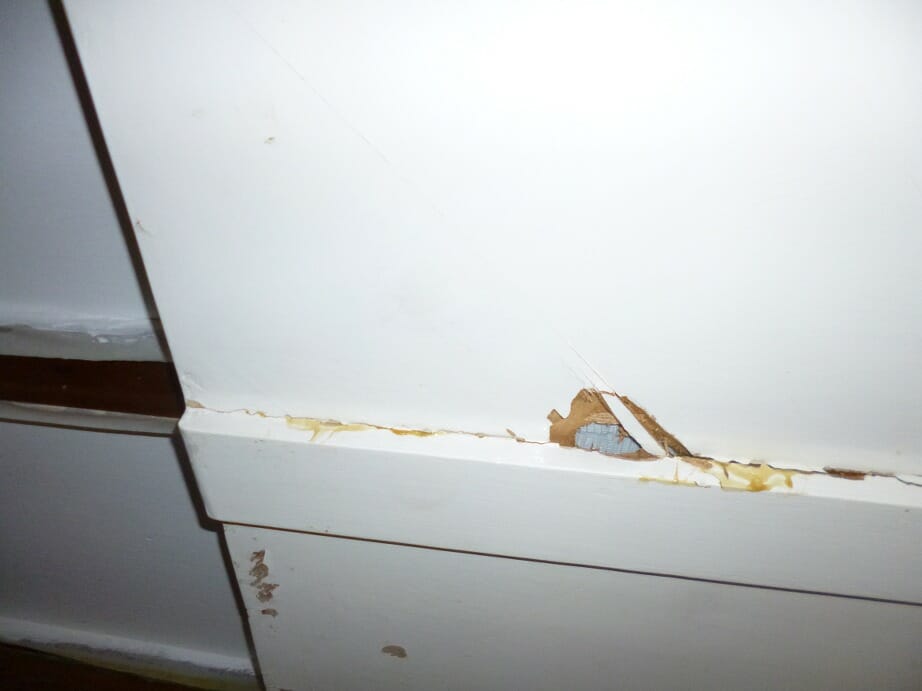
To do the repair properly I removed the cross bar forward of the hatch so I could remove the top laminate completely and effect a seamless repair. This appears as if it was attached to the hatch runners mostly by glue. But it also looks like a piece of dowelling ran across the joint. With this removed I was able to remove the rest of the “plank” and replace the outer laminate from the centre joint to the hatch as one bit. I found that it is easiest to chisel off the plank down but not including the glue. Then to sand through the glue. Any attempt to chisel the glue off ran the risk of extracting a large portion of the next laminate.
I also removed the outer layers of laminate on the port side where the laminate had been split a good 6 to 8 inches. The top view from the original post shows where this had been held together using duck tape for the remainder of the season. Most of that triangle between the centre joint and the hatch had to be removed. A smaller portion of the second layer had to be removed from the centre.
One problem I encountered is that over many years of sanding back and re-varnishing the outer laminate was getting to be very thin. This also meant that the centre joint was getting thin. To address this I have also glued a veneer strip over the centre strip. This avoided me having to sand the new outer plank back to the same thin state. I glued the strip in when I replaced the cross-member that sits at the front of the hatch. I have not sanded this all back yet as I wanted more than enough time to let the resin set.
I eventually used Aemme Epoxy resin as that is what they had available at the marina. The glue I ordered in January had not turned up and I will have to track that down. But this stuff was good. I mixed this with sawdust to a “peanut butter” consistency.
My wife and I spent a week in February in Sardinia with the intension of me fixing the hole. I had managed to cut out the small bit you can see from the top view. But I realised that it was a bigger job and not to be done hastily. Also my wife was getting bored in mid winter and most things were closed.
So we decided to take the rest of the week to bus it around and back up to Magdalena. I did however now have a better understanding of what was needed and how it was going to work.