
A169 “Elle” (formerly Kerry Piper)
Wooden Boom and mast rebuild 2018
Boom
Boom rebuild was completed over the last week in August – see photos for work stages etc. Still a few coats of varnish to add to the UV resistant clear epoxy coat – as shown in photos. The new Sitka spruce lower section is a couple of shades lighter than the original salvaged top part. The bronze Lewmar gooseneck and end fittings were salvaged from a vintage yacht of similar size. Barton sliding track/block has been added for the new slab reefing setup, with lazy-jacks.
The original roller-reefing boom had succumbed to rot while stored. Most of the affected timber was in the lower boom section; the top part including slot for the foot of the mainsail was mostly intact. The only way to salvage the spar was by cutting off the lower half and making-up a new section. A 4 metre length of 40 x 100 Sitka spruce was obtained from Robbins Timber in Bristol (marine specialists)– delivered to Rye.
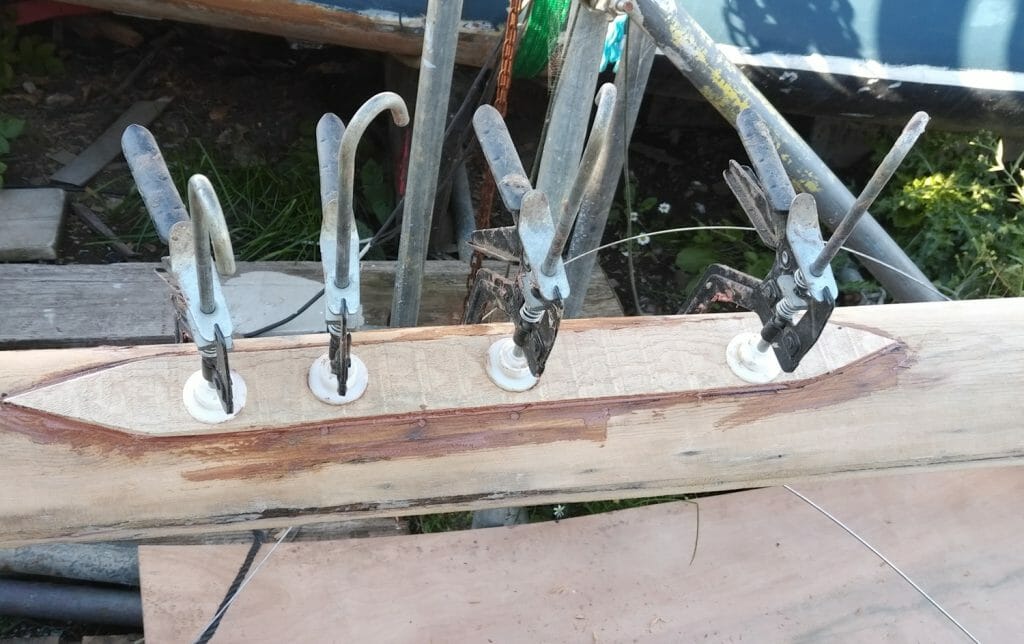
Stages of the boom rebuild – photos show sequential steps.


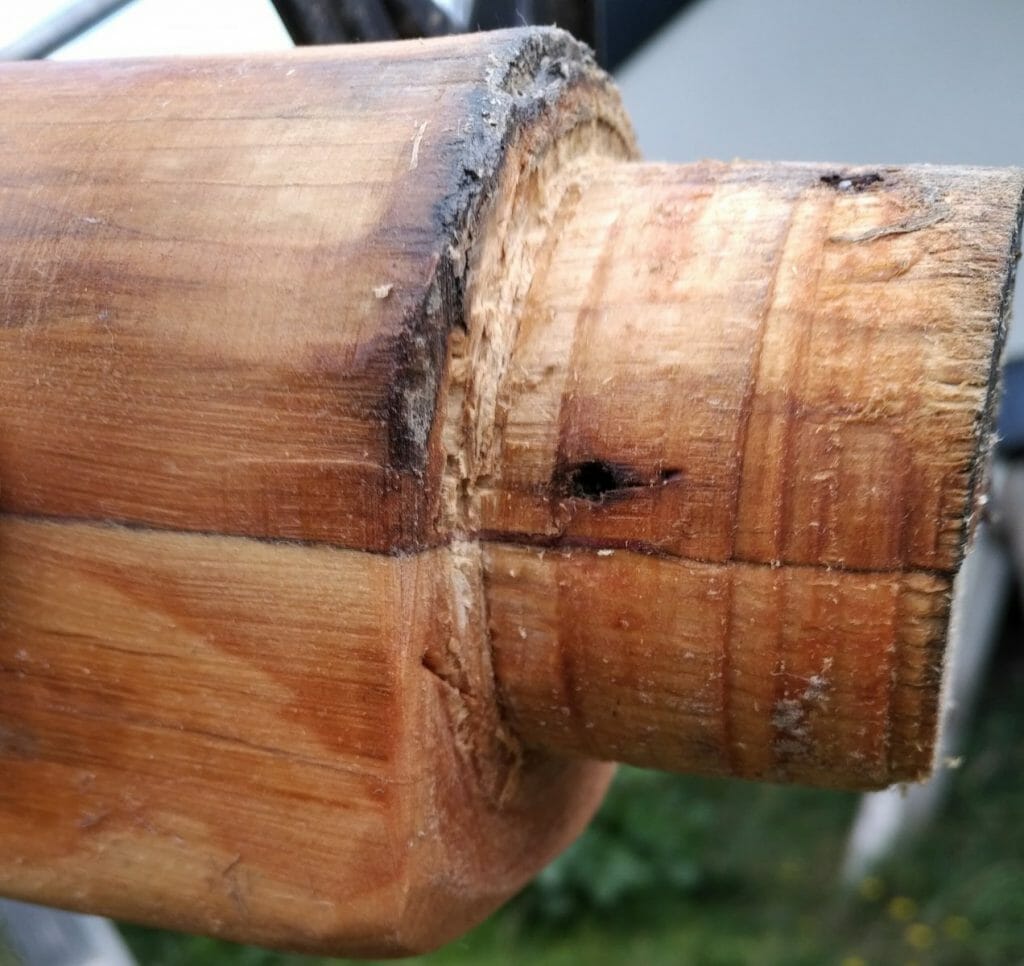


Firstly, the original boom was cut in half lengthwise and new lower part cut to size. Original top and new bottom sections were aligned new timber was marked for internal routing and external shaping.
Progress through planing, routing and sanding solid and hollow sections can be seen in the photos. The new boom is now round on the top with a more squared new lower part. This shape provides a strong fixing point for the new slab reefing; kicking strap and lazy jack points. A heavy gauge SS vang / kicking strap fitting will be bolted through the new lower section roughly in line with the forward (companionway) bulkhead. The vang to be deployed from a pad eye on the front of genoa tracks port/starboard by means of a snatch block as suggested by Dr Thursfield (A180) in the 1973/74 Bulletin article Tuning an Atalanta.
A customised sliding gooseneck mast fitting was made up from surplus 2mm stainless steel sheet – left over from the electric motor housing (see AOA website for installation); and a 30mm length ss bar plug-welded to take the sliding car (see mast section below for sliding gooseneck photo).
Mast
Mast overview
The mast was in a sorry state – fractures / rot at the diamond spreader bracket; same issues but even worse at the main spreaders; rusted galvanized through bolt at mast base – water ingress etc – see the first photo section for the gory detail.
Mast construction is in two hollow ovoid lengths of spruce which are joined lengthwise as port and starboard halves with solid bolt-through fastenings at the diamond bracing (single 12mm bolt) and main spreaders (2 x 10mm bolt); through-bolt fastenings also at the masthead through main halyard sheave (7mm) and bolt through original winch fitting at the base. The edges of the port and starboard mast halves are glued along the seams with resorcinol glue.
Much of the seam join had opened; the lower third of mainsail mast-track had been filled with a flexible Sikaflex type product. NB: where the original glue was intact it still formed a perfect bond! Most opened seam issues appeared to result from track fixings etc allowing water ingress into the join and rotting the adjacent timber. This was likely to have been happening over the 10 years of lay-up on her trailer before I acquired A 169.
Preparation
The dreaded job was finally under way (from first week in September) starting with opening the glued seams along its length (see photos) and separating the two halves. The damage was not quite as terminal as first appeared and after some research I was confident all the structural repairs could be remedied with epoxy glued spruce splines (internal and external). Plenty of the Sitka spruce from the boom rebuild was available for this.


Cleaned internal sections were given a saturation coat of epoxy at the short intermediate solid joins (i.e. where the mast is not hollow); the original timber although still mostly sound had some grain separation (photos). Saturation coats were also applied to the inside of the fracture at the crosstree spreaders. This section was splinted with a couple of tightened lanyards to assist in retaining the shape prior to the spline repairs.

Mast base had the remains of the oxidized galvanised (halyard winch) bolt removed – see photos for the damage caused to this area, the timber was mostly sound however and was given an initial saturation coat of epoxy into the opened grain.
Internal spline repairs
Second week in September the first step – separated halves laid out on trestles (inside face-up) – was to rout 50mm slots through the solid 250mm mast joins (in each half) at crosstrees and diamond brace (4 total); 90cm formed splines were then glued into each slot either half of mast. Specifically, the splines were set into the forward mast edge; each spline overlapped the solid joins (shaped into the front edge radii). The spreader and diamond brace through-mast fastenings will pull both splines together when mast is reassembled (see photo). So, the effect will be to reinforce and extend the solid join to 90cm at the two areas of mast stress.


The final job with the mast open was to channel a route for VHF and masthead Cables to run internally from the base to top of the mast; when in place these were tacked with epoxy. Next day the two mast halves were reunited – several quick epoxy mixes (SP 5:1 with West low density filler) clamped to set.
External spline repairs
Fractures and holes at the spreader and diamond brace fitting (photos….) had the new solid internal splines inside the mast immediately below the visible damage, but still required spline scarf repairs for a complete repair. The damaged/rotted spruce was cut out down to the new solid spline below at both areas – 40x7cm at the diamond brace (starboard) and 70x 7cm at spreaders (port). New Sitka spruce splines were cut, shaped and epoxy glued /clamped (photos).


After removing clamps, new repairs were rubbed down and the whole mast given a coat of clear epoxy (UV resistant); further coats of UV varnish will be added over the next few months before going afloat next year.

Mast fittings
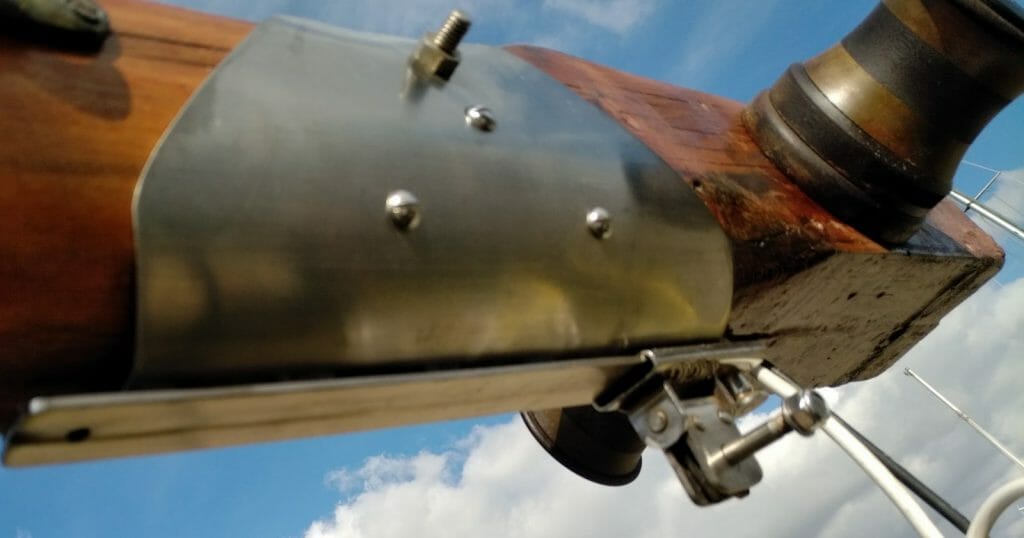
Over the next couple of days away from the boat, spreaders; diamond bracing and mainsail halyard sheave were refurbished. The spreaders and bracing were rubbed down to bare metal; primed with Primocon 3 (International Paints); and finished with a couple of coats of exterior polyurethane. The bronze (or brass?) top sheave was originally intended for wire main halyard; as I’m switching to rope halyards, had considered replacing with Tufnol or similar. But after checking the intended rope (8mm) found that the original sheave will be fine just applied a coat of polyurethane to the contact surface. Another issue with the masthead sheave was that the centre bush had gone leaving the 7mm centre bolt /spindle in a 14mm sheave hole; so new bush was fabricated from drilled-out Tufnol rod. The mainsail track and bronze mast base step fitting were sandblasted prior to refit (photos) NB: Track not yet fitted at time of writing.


Original wire halyard winches were replaced with Tufnol two-speed rope type (photos). Annoyingly, the new winches required four through-mast bolts instead of the single through bolt fixing of the original. Four single fixings for both winches was achieved with the use of countersunk rivet nuts mated to 4 x 120mm countersunk machine bolts (hole alignment – bit of a faff). This type of Tufnol winch is attached by the base and the upper part is fastened onto the spindle (in the base). So, the two base plates are fastened together through the mast with the four nuts/bolts.
![]()

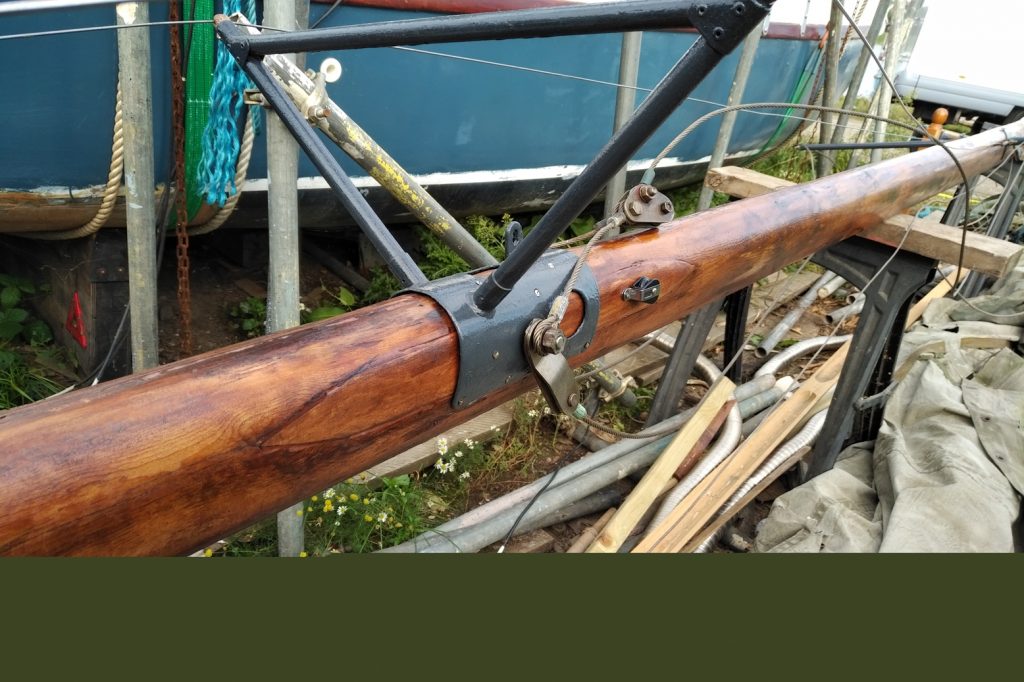

A custom sliding goose-neck fitting was fabricated from 2 mm stainless steel to facilitate raising the boom height over the cockpit for improved headroom below the boom tent – see previous blog and bulletin for more on making the tent. This will of course also provide further control of the mainsail under sail.
Mast rigged and ready for final tweaks before stepping – replacing fixed split/forked type backstay with a bridging block and single lower part (i.e. instead of two single lower parts to the split backstay; also adding a second forestay (keeping hank-on sails) to assist in sail handling.
Chris
Wow! Great work. You make it look and sound so easy.
And I love some of the ‘extras’ you have added. Its almost worth splitting the mast just to get the lighting cables in the cavity! The sliding gooseneck will be a great addition too.
The kicking strap issue is a recurring one. When I converted my boom to slab reefing and loose-footed I had a strop which I sheeted to the side when off the wind. However it put some alarming bend in the boom, even though it was attached where the boom is solid (according to drawings). I have stopped using it.
But your new bottom half I suspect will solve that problem – I imagine your boom is much stiffer now?
Cheers
Nick
Here is a photo missing from the sequence showing the spreaders after fitting.