Calista was damaged while on the way to the yard to be launched. The damage was caused by two vehicles hitting the back of the boat.
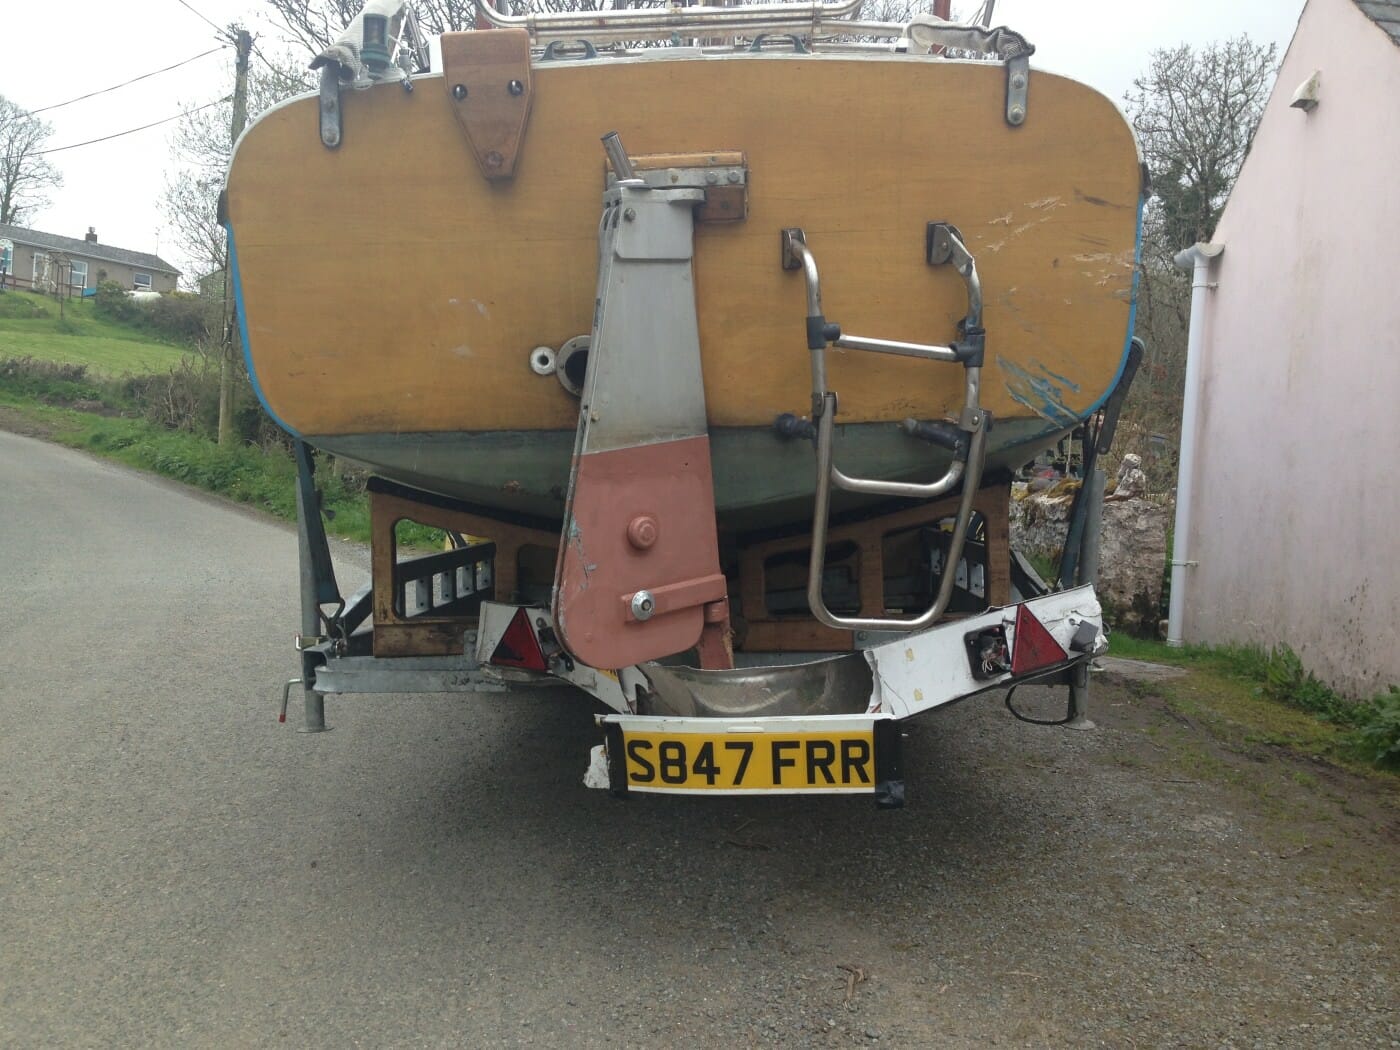
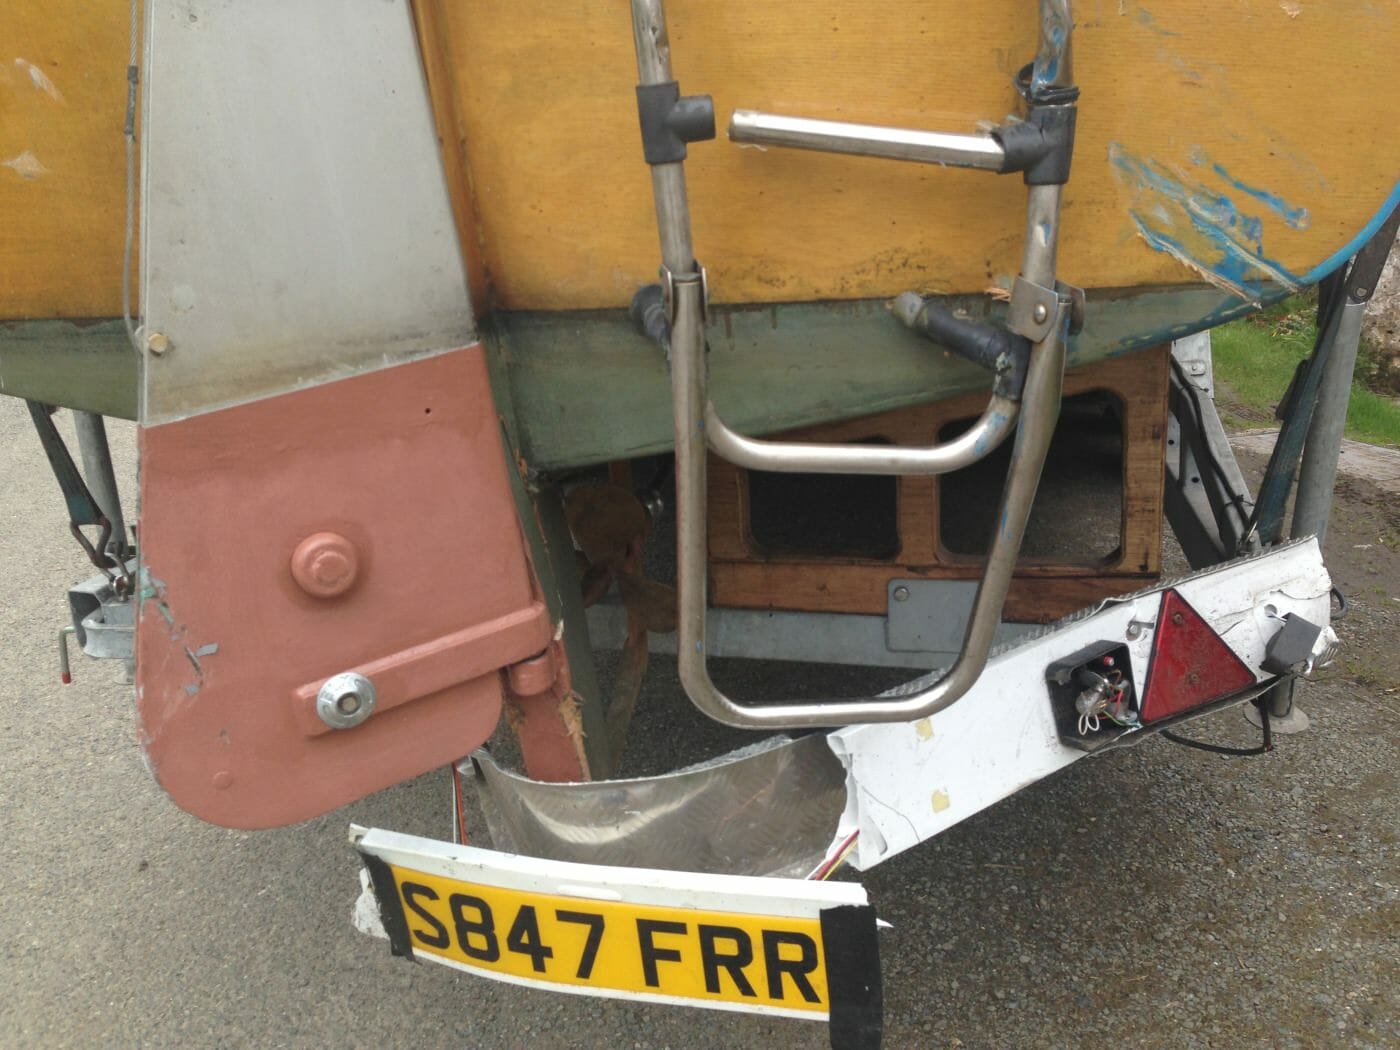
You may be able to see that the rudder has been forced hard over, splitting the transom, snapping the skeg and distorting the alloy rudder. It also bent the prop shaft. The damage to the lighting board is clear, and the rear crossmember on the trailer is bent.
I have some thoughts on the varnish problem you had. A byproduct of epoxy cure is a chemical called amines. These are not soluble in typical solvents that you would use to wipe down for varnishing. The effect is called “amine blush” Usually occurs when a slow hardener is being used, it is cool, and there is moisture in the air. I realize that it is rarely damp and cool in the UK but it does occasionally happen…. Best way to check for this effect is if the surface feels greasy. Conveniently, amines are soluble in water, so take a Scotchbrite pad (essentially a plastic version of a steel wool scrubber, made by 3M in the US, not sure of what is available in the UK but must be something similar. Scrub the epoxy surface with the pad, some water and even some dish detergent. Then scrub a few more times with water, changing it frequently, then rinse off with a hose. The Scotchbrite pad does a nice job of scuffing the surface of the epoxy in the process.
The WEST system brand of epoxies has a hardener especially for this type of application. It is formulated to fight the amine blush and is particularly clear, the number is 207 to go with the 105 resin, their basic resin.
While a shame about the wreck, the end result looks very nice.
So how many people did it take to keep you from going completely ballistic on the drivers of the cars???
The final comment to show the finished job:
That is 8 coats of varnish by the way. 6 of a special Epifanes 2 pack varnish which interfaces between epoxy and other coatings, and 2 of Epifanes gloss varnish.
Just a brief update regarding varnishing.
My problem is trying to use conventional varnish over epoxy coatings. Just does not work. I appologise for doubting the quality of Epifanes varnish! Purely the result of frustration.
I did a trial with the epoxied wood and untreated wood. That on the epoxy would not dry, that on the plain wood did. I also spoke to the epifanes rep who was most helpful ( I had calmed down bewcause it was after I had done the test) and he advised using a particular epifanes product to build up the coating thickness and act as a barier. I will use the gloss varnish as a final coat to improve UV resistance – mainly because Robbins do not stock the 2 pack varnish.
So Murray was correct you cant use ordinary varnish over epoxy – unless it is really well cured (months).
You’ve convinced me to build a wood rudder for A77, I’ll post a photo of a rudder with mahogany cheeks that I built ~ 20 years ago for a Flying Scot. It’s seen rough use, many times in 25 – 30 knots gusts and still in good condition. Sandy Douglas had some very good ideas built into the Flying Scot. He raced Uffa in the International Canoes (have to tie it into the Atalanta some how)… I’ll post the photo in the bar section.
Firstly in response to Murrays comments. I didnt actually think of using 2 pack varnish. I could have used it – have in the past. The wood was new and alreaddy coated with epoxy so it would have worked. I suppose I have every other varnished surface coated in single pack varnish so at least it is all the same.
I did scrape off the Epifanes with a plane blade. The varnish had rippled – like skin that has been in the bath for too long, presumably the subsequent layers being applied before the first is properly dry. I have now given it another coat of Epifanes and it took 48 hours to be tack free. I am going to have to wait another day and then I will sand it wet. I am going to use the Wilcinsons yacht varnish. I’m just not prepared to wait 3 days between coats – I want to go sailing!
I have found that it is more important to revarnish annually rather than worry too much about the quality of the varnish. I only bought the Epifanes because I wasnt paying – and regret it.
Anyway enough of that.
Rudder stock:
Of course it is slung up side down here but you can see the brass insert half way down which supports the axle for the pulley over which the rudder downhaul is fed. That is as per the drawings. You can also see at the bottom (the rudder head) where the slots for the uphaul and downhaul wires have been cut out (one each side). There is also a cutout for the pulleys to sit into. You will notice that the edge of the stock which you can see shows no plywood end grain – it has been veneered (to the waterline). So that is it with 2 coats of epoxy as a primer.
Just a detail to demonstrate how proud I am of the brass inset into the wood!
I had to make new axles for both sets of pulleys – because they had to be longer to suit the wider rudder stock. Also had to make a new pulley to fit between the cheeks and fill the space so the wire could not be trapped betewwn the pulley and the cheek:
Hi Trevor
I am enjoying following your progress.
I used Epifanes single pack varnish on Methuselah’s mast and it went on very well.
Are you thinning it? Did you consider using two pack?
Murray
I have started to varnish the transom. I have been using Epiphanes varnish (supposed to be the best?) but without success.
It just isnt drying. Supposed to dry in 3 hours, and recoat in 24. Its taking 36 hours to stop being tacky! Probably going to have to scrape it off again. Tempted to go back to the cheap Wilkinson yacht varnish which I have used so successfully for the last few seasons.
I wonder if it is a duff batch?
Getting on with the rudder. The three parts of the stock are bonded together:
A trial assembly of the blade and stock. Very keen to see that the front edge of the stock and the front edge of the upper part of the blade are in line. I dont want the blade digging into the back of the skeg:
Of course I am glossing over the many minor alterations that have to be made to make sure it all fits properly, including making sure that the blade travels fully to the raised and lowered positions. Making sure that there is room for the downhaul wire. The bolt is an M16 by 70 mm bolt with large washers, all in A4 grade stainless (the drawings specified the imperial equivalent). Next job is to fit the pulleys for uphaul and downhaul!
Tim
I see what you mean. I dont know enough about the detail differences to really be able to add anything worthwhile, apart from saying that there may be have been more than one p bracket design. I agree that the skeg length must have depended on the shaft and p bracket allignment. Calista has had an all welded mark three rudder stock and a mark 2 skeg – as shown dotted. I have been careful to double check the dimensions on the wooden rudder stock drawings – and have made sure that they marry up with the boat!
Trevor
Thanks for the response, the Type II catalog schematic depicts the P bracket bar lower than the Type I “shown dashed for Titania layout” …. I suppose it really doesn’t matter because the length of the skeg is ultimately defined by the angle of the prop shaft and the length of the P bracket. Btw, I just received in the mail the Repair Manual for the Keel Assembly and Mounting Structure, so thanks for this too. t
Tim
I am fairly sure that the bronze casting – lets call it a “P” bracket – is the same on most of the boats. There was a laterr variation where the propeller shaft deadwood was longer and the P bracket was dispensed with. The drawing catalogues on the website illustrate these differences by the way.
As far as the rudder length is concerned the bottom pintle is mounted on the wooden skeg – and the issue is how far down the wooden skeg it is fitted. So the length of the rudder stock has no impact on the shaft or “P” Bracket. I dont know how the different engines affected the shaft – but I think the installation of th “P” bracket and shaft is the same for all variations – apart from the later boats without a “P” bracket that is. The shaft line for them may still be the same though.
Trevor
Trevor, I see the different 33″ vs. 37″ dimension between Type II & Type I from the top of the rudder but I’m
not sure if the bronze skeg casting is also different or just located in another location fore and aft along the keel. Do you know if the bronze skeg is different from Type I to Type II? I suspect it is because the shaft angle would also change.
I have been getting on with the rudder.
This is the centre section coated with resin and then with Ceramic epoxy primer:
Each side cheek was coated with epoxy resin and covered in glass cloth. The area which will have the blade in it has also been painted with the ceramic epoxy primer:
The sides of the centre piece were coated with resin, and then epoxy adhesive (using a colloidal silica filler powder) before clamping it all together. You cant see it but there are two brass rods (3mm diaeter) passing through all three pieces in a place which will be hidden by the metalwork, to register the parts accurately and stop them sliding as they were assembled:
Tim
I was thinking of getting Dinah to follow me to the yard in her car, but of course there is always the danger that some idiot will overtake her and we are back to the same potential!
Trevor, the diagonal transom layout with genuine mahogany is better than the original. Hope you can launch soon once you have something better than a banana to steer with, you might consider a spotter vehicle to run blocker to the harbor!
great repair job as usual, shows how relatively easy it is to repair an Atalanta and how robust they are, not sure how a plastic fantastic would have faired in a similar accident or how you would have repaired one to such a high standard
Now the main issue to resolve is the rudder stock which resembled a banana!
I have not been able to interest a manufacturer in making an alloy stock, so I have explored the drawings for a “redesigned wooden rudderstock ” dated 1962.
The metal fittings are similar to the tiller and top gudgeon on the alloy stock, as are the bottom gudgeons. They are just wider, to accomodate a 2 inch wide rudder stock. The fitting are on order. I wont tell you how much (at least it will eventually be on someone elses insurance, hopefully)!
Here is the first cheek, and the distance piece which goes between them. The distance piece has to be reduced to the thickness of the alloy blade
:
Because the high quality ply has all its layers made from rotary cut mahoginy it has a strange surface grane which wont match the transom. So the outer faces were veneered with what was left after fixing the transom:
Well that is where I have got to today, and I am off to work tonight, and it will all have time to cure before I do any more.
So the boat is just about repaired!
Here is the current state, with the topsides paint repaired, the transom primed with epoxy, and the copperplus epoxy antifouling repaired:
You may know that the skeg is an “L” shaped piece of hardwood, extending up the transom, and under the hull, The part extending up the transom had snapped off, and the section under the hull had come away from the hull. It was not the joint between hull and skeg which had parted but the sandkeel which is between the two. It was not the glue lines which had failed either but the sandkeel (about an inch thick) had split all the way through. Also the ends of the venner on the hull were damaged.
So the first part was to repair the hull:
and then to replace the sandkeel between the “P” bracket and the transom
and then make up a new skeg from 50mm x 75 mm mahigany joined together, and shaped to fit:
And finally bonded in place:
You can see the replacement shaft – which had to go in before the skeg was fitted.
Of course the sides of the hull where they attach to the transom were damaged as well. This is an example. The deepest gouge goes right through;
The usual techniques were used to repair these:
The repairs are now almost complete, well we are at the varnishing stage. The repairs involved stripping away the outer layer of veneer from the transom (badly scraped in a number of places and to provide access to repair the transom structurally. You can see that a cutout has been made from where the tiller fits right to the starboard edge, and a second larger cuttout surrounding it:
The inner part was filled with solid timber (the top section of the transoms are always solid timber and the lower section on later boats is ply). The outer cuttout is filled with agba veneer with the grain up and down:
The final veneer was replaced using mahogany rather than agba (similar price) and at an angle at the suggestion of both Colin and Dinah: