
This will be my last post on Helene’s Boat Blog as owner. In fact although started before the sale it is being published after handover to Jim, the new owner. Due to a variety of factors including Covid-19 and a house move I had the pleasure of working with Jim on fitting out. I had agreed to complete a couple of jobs as part of the sale and to help get Helene ready for the season. The largest of the jobs was associated with the cover plates on the keel bolt holes in keel boxes.
The Situation
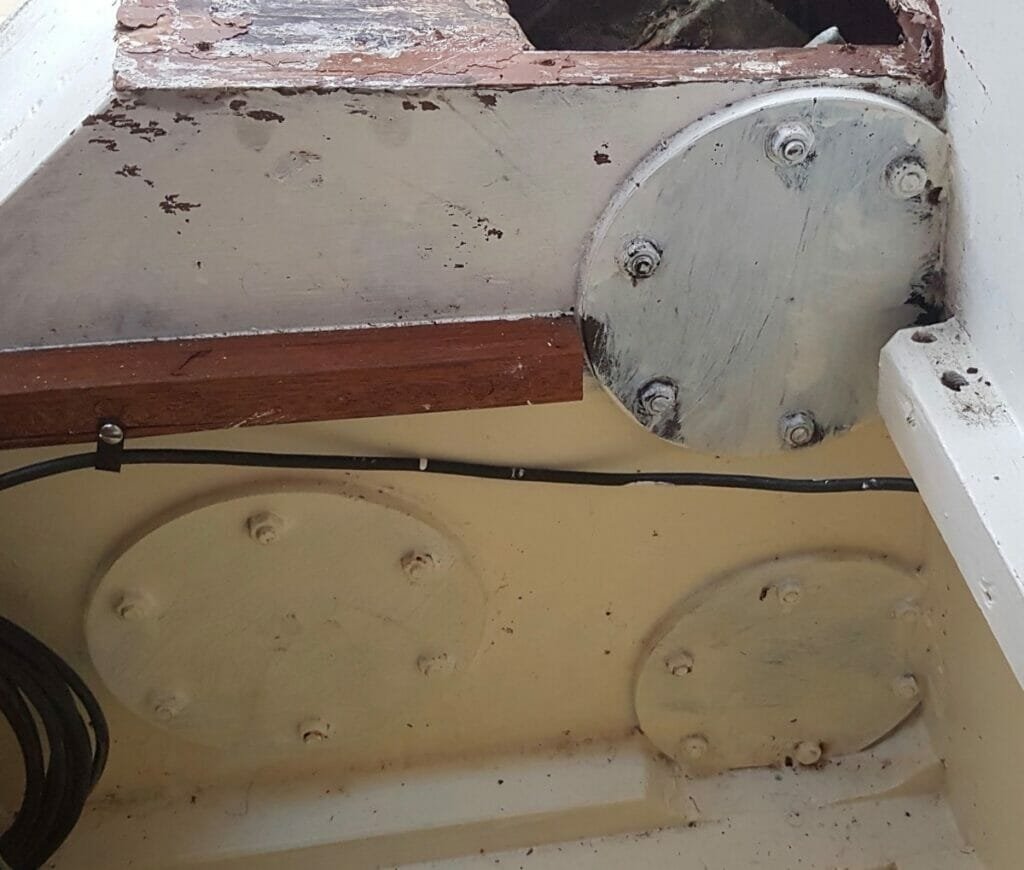
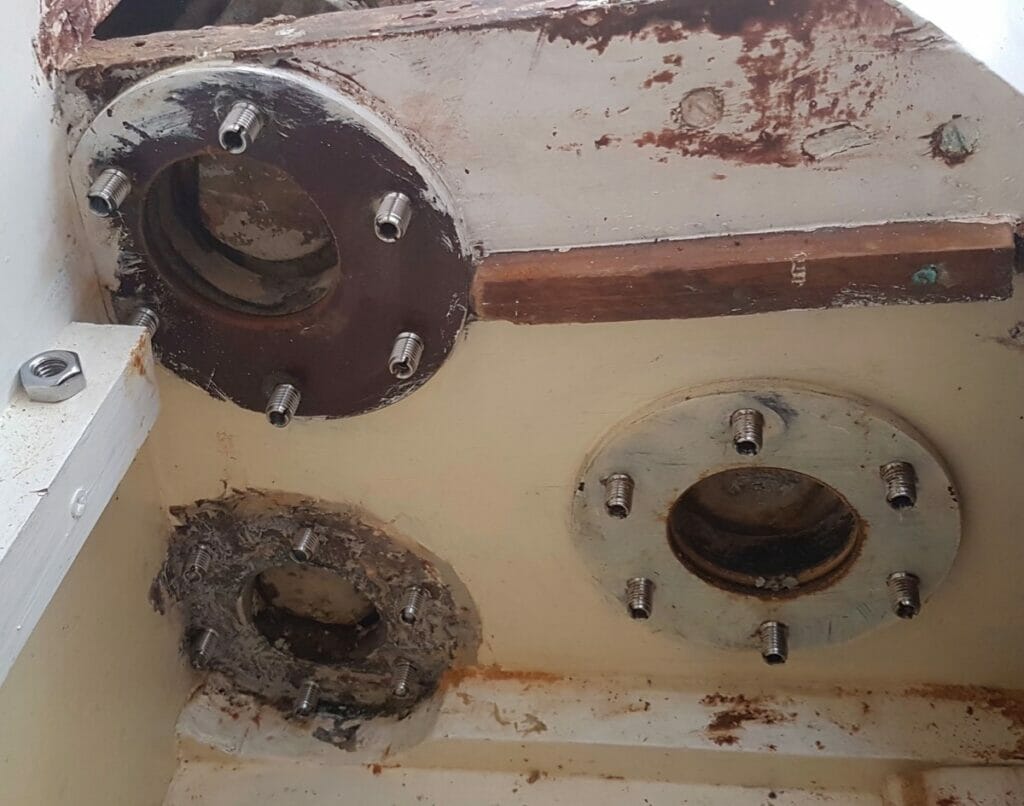
Helene had very neat keel bolt covers made in tufnol and held in place by six 6mm bolts each. These were fitted by a professional boatyard during a major refit carried out by the previous owner
The Problem
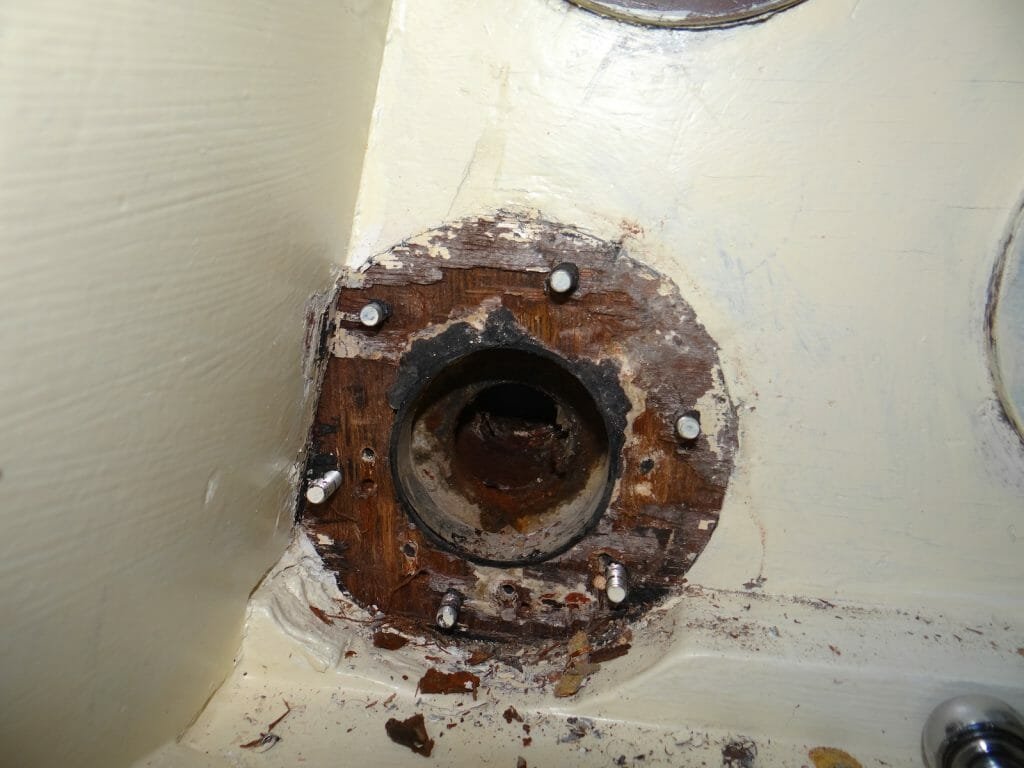
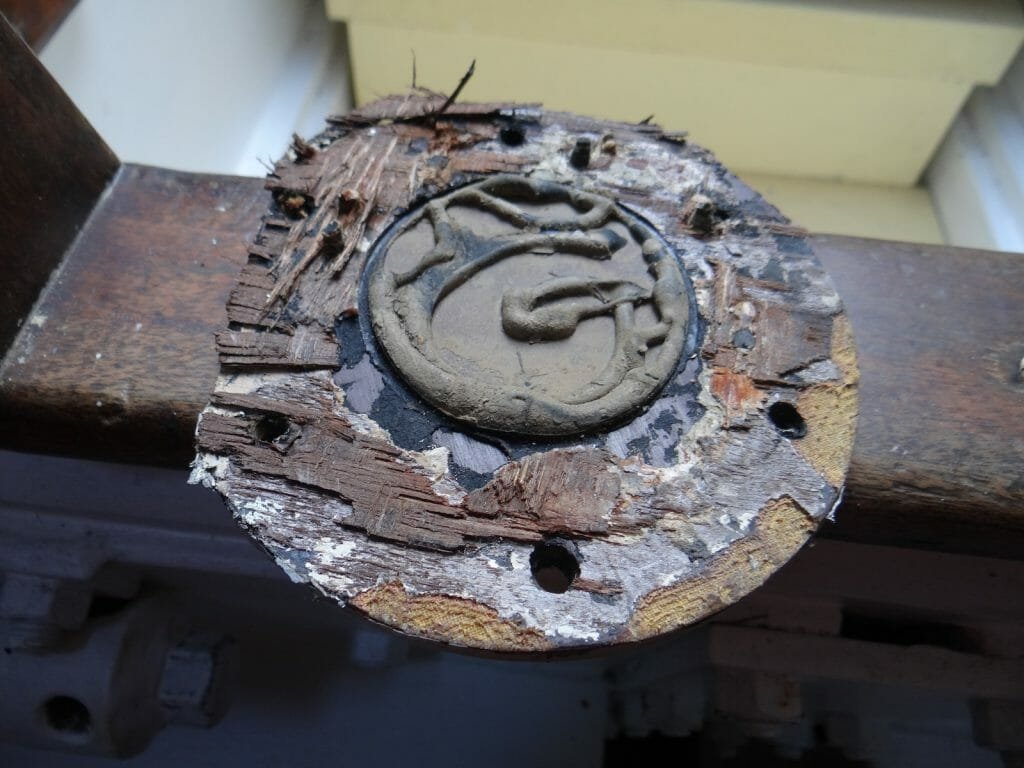
This was discovered when I tried to remove the keelbolts in 2016. I started with the starboard pivot bolt. It quickly became clear that the cover plate was going to difficult to remove. Although I was being careful with a thin chisel, removal caused damage to the surface of the keel box plywood.
The professional refitters had used Sikaflex, or a similar setting mastic, to seal the plates.
Aghhhhh!
Why hadn’t they used a non-setting mastic? Who knows. Removal of the other plates threatened further damage to the box sides.
Having examined the bolt (no issues) I made good with epoxy resin and then filler and refitted the plate using butyl rubber sealant and set to thinking about what to do.
A Solution
Many options for removing the remaining five plates were considered: diamond ‘wire’ saw; oscillating saw; judicious use of heat; or even just accept the damage and make good with epoxy.
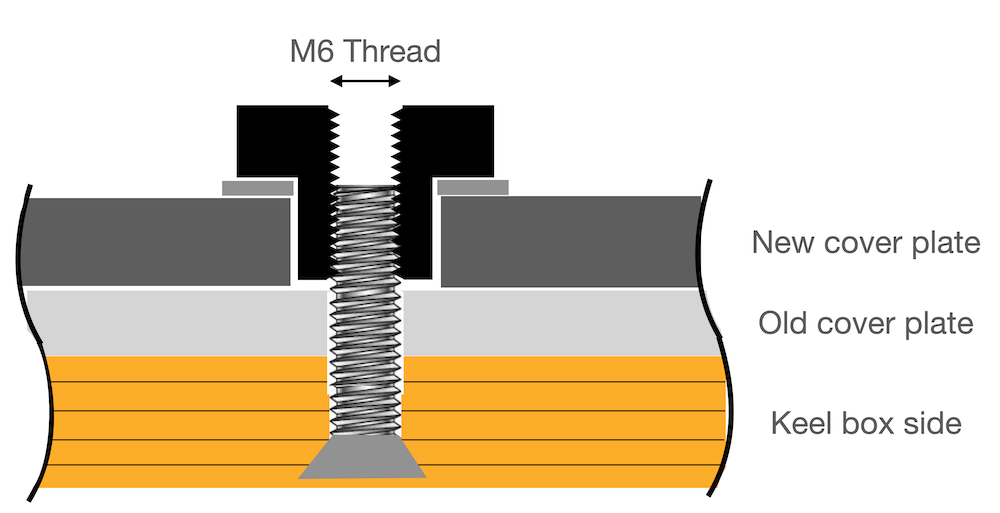
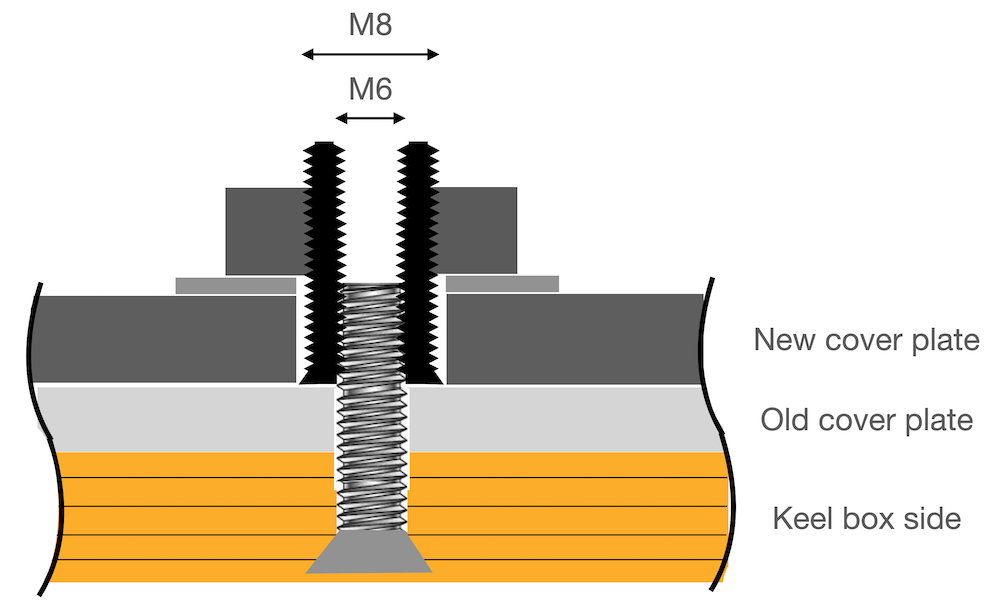
In discussion with our Secretary, Richard, he introduced the idea of leaving the existing plates in place, cutting hole in them and fitting a new plate over them. This seemed a great idea to minimise damage to the keel boxes. Cutting the holes would be relatively simple using a hole saw (in theory – see below) but how to fit the new plates to the existing bolts. These bolts protruded through the existing plate by only 6mm to 9mm. The new plates would be at least 5mm thick which would not leave enough thread for a standard nut.
Scouring fastener manufacturer sites on the internet yielded the first solution – use of top-hat shaped barrel nuts:
These nuts would need to be threaded all the way through to accommodate the different lengths of exposed stud, and the ‘shank’ would need to be slightly less than the thickness of the new plates. It transpired that what I sought was not a stock item and would have a minimum order of 1000. Back to the drawing board…..
Further browsing threw up the idea of screwing a ‘thread converter’ over the existing 6mm stud thereby extending the exposed thread through the new plates. A 6mm to 8mm, 14mm long was a stock item and fitted the bill perfectly.

Making it happen
Cutting the new plates was easy, in 5mm marine ply (very expensive ‘Bruynzeel Elite’, left over from a project in the 1990s – I knew it was worth saving those scraps). Drilling the 10mm holes for the fitted thread converters was slightly more difficult as it transpired they were not regularly spaced. A couple of template iterations and use of a round file resulted in six snug fitting plates.
Now to cutting the holes in the existing tufnol plates. The theory was simple and I had a cheap holes kit with a 60mm blade. This worked okay-ish, particularly using Jim’s idea of some lubricating oil. But it turned out 60mm was only just big enough due to the difficulty aligning exactly with the bolts – the centre of the bolts does not coincide with the centre of the cover plates. A (quality) 70mm holesaw was bought by Jim, and proved excellent – much quicker and large enough to accommodate misalignment of the hole and bolt.
Which left only the challenge of getting the holes onto the plates, particularly the pivot and top clamp bolt where the hull or bunk structure meant insufficient room for the combined length of holes and drill. So the last purchase for the job was right angle drive. Job done.
The plates were then fitted using butyl sealant.
-
 A124 After careful alignment (a mixture of measurement and eyeball) a hole saw was used to cut the holes. The thread adjusters are in place.
-
 A124 Hole cut for the starboard upper bolt.

-
 A124 Hole for the starboard lower (forward) clamping bolt.

-
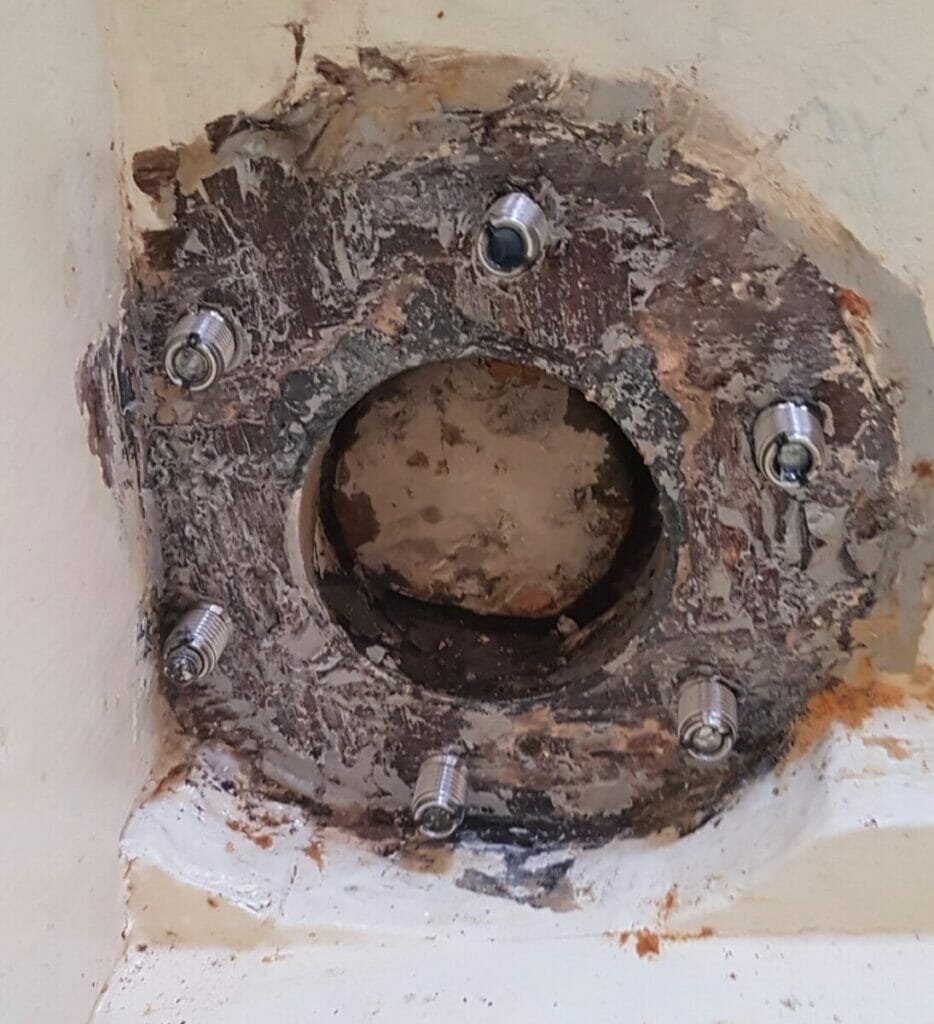
 A124 The prepared starboard pivot hole. Oops – forgot to fit the old cover plate removed to cut the whole (corrected before assembly).
-
 A124 Alignment for the hole saw on the Port side was a little more awkward, particularly for the pivot bolt.

-
 A124 Port -upper clamping bolt hole cut.

-
 A124 Port – pivot bolt plate hole.

-
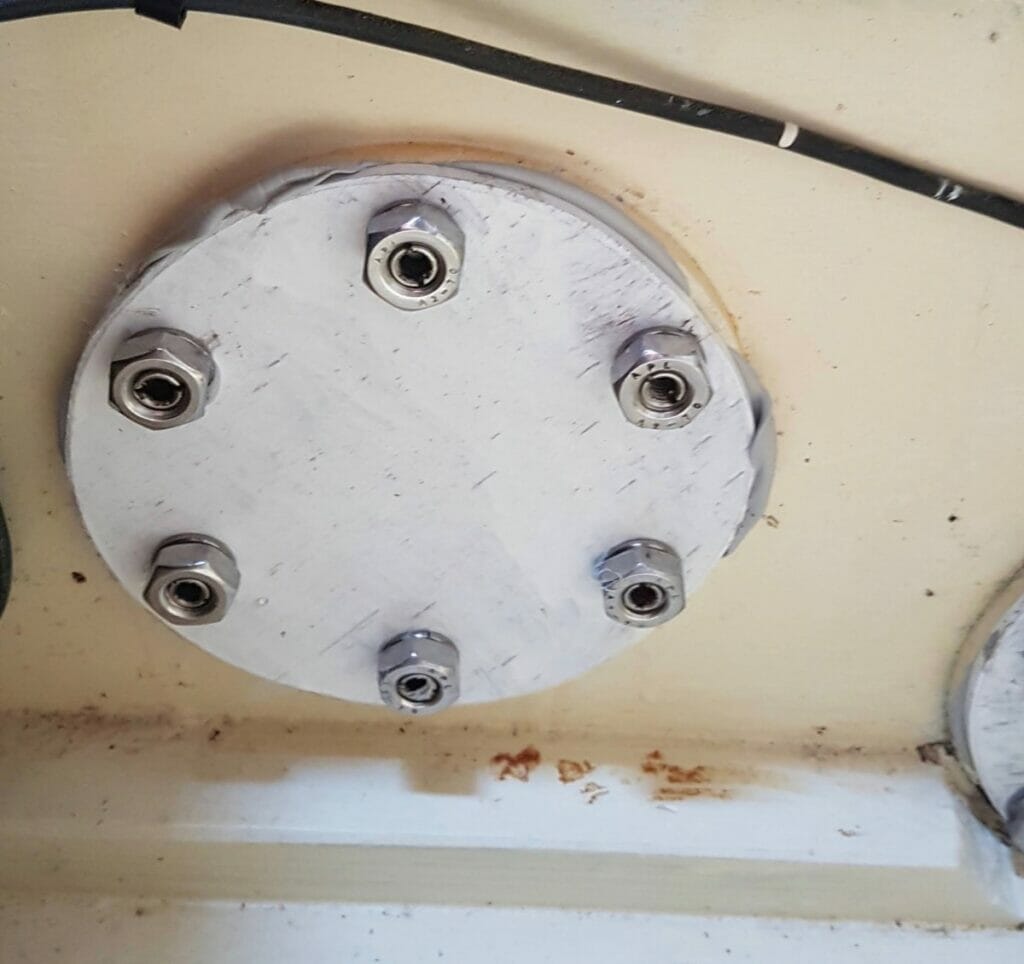
 A124 New starboard plates fitted over the old ones with the holes in.

-
 A124 New port plates fitted over the old ones with the holes in.

-
 A124 New starboard plates fitted over the old ones with the holes in.
-
 A102 A102 keel bolt covers

I got round to greasing my pins, I got one side done. They have not been out since Sardinia (2014) lots of salt water under the bridge so to speak.
I think Graham had done Mary proud, She has galvanised steel plates and the lower two have anodes. As shown.
The front pin is the worst for wear, I certainly think the head and centre of the front pin should be painted as these areas don’t get wear but are exposed to damp conditions. The foam seals work a treat but I will grease the new ones.
I think I could really do with new pins. I did use lanolin oil on these but probably not enough. I seem to remember being restricted by 150mm containers going through the airport.
Mary uses a foam ring, without sealant. To be honest bevelling in an ‘O’ ring with a bit of grease should do? That way you can double up on spares for the engine water filter o-rings? I am a fan of lanolin oil, ‘orrible smelly stuff but hydrophobic and organic.
How silly of me not to say.
‘Marine Bedding Sealant’ from Traditional Boat Supplies has served me very well. A lovely gooey butyl compound. See https://www.traditionalboatsupplies.com/sealants-and-bedding-compounds/119-marine-bedding-sealant.html.
I have also used Arbomast when I have no TBS goo to hand – cheaper and available from builders merchants. However Mike had a bad experience with this on A1 which has made me more circumspect about using it: he sealed his keel bolt cover plates with it and one of them failed. It was a difficult seal with limited mating surfaces (now being modified, but even so …..
I have used the TBS goo under water and above on an ageing carvel boat, and extensively for bedding fittings and windows on wooden and fibreglass boats (although I now favour closed cell tape such as for the latter – as in 2015-16 Bulletin).
However, never used it for bedding Atalanta keel steelwork – It would be interesting to from others who have replaced steelwork what they used.
Cheers
Nick
A very neat solution!
What non-setting sealant would you recommend? I too do not want to put bits in place knowing that I will never be able to get them out again without damage.