After much prevaricating, Bluster’s trailer was removed and the keels lowered to the ground. The supporting steelwork was then also removed for inspection.
Before removing the trailer, I cut off most of the keel band. This was rusty, but still had quire a bit of steel left. However, some of the securing screws were broken and it was hanging off in the middle. It had obviously been replaced before and the wood beneath it was not in good condition and filled with cut-off old screws. It was held on with bronze screws which came out easily, but were seized where they passed through the steel. To remove them, the keel band was cut between each screw and the sections unscrewed.
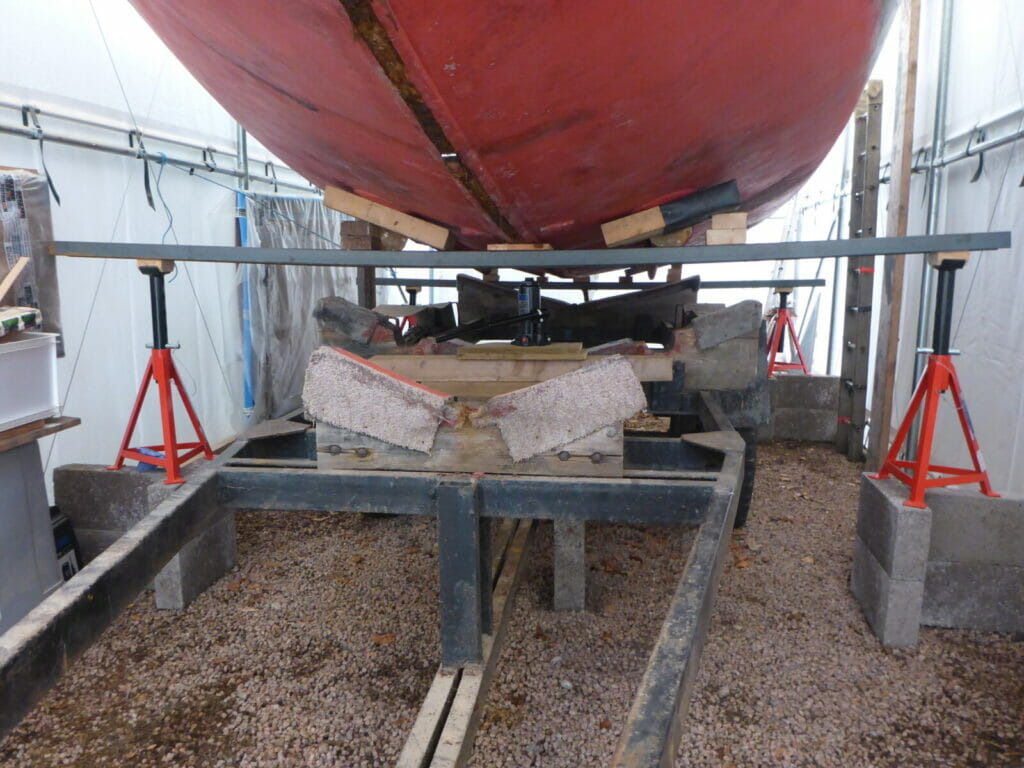
Jacking Bluster up off her trailer went smoothly, with the aid of 24 concrete blocks, four tall axel stands, a bottle jack, and two 3 metre lengths of channel section steel beams. The trailer cleared the beams by a millimetre!
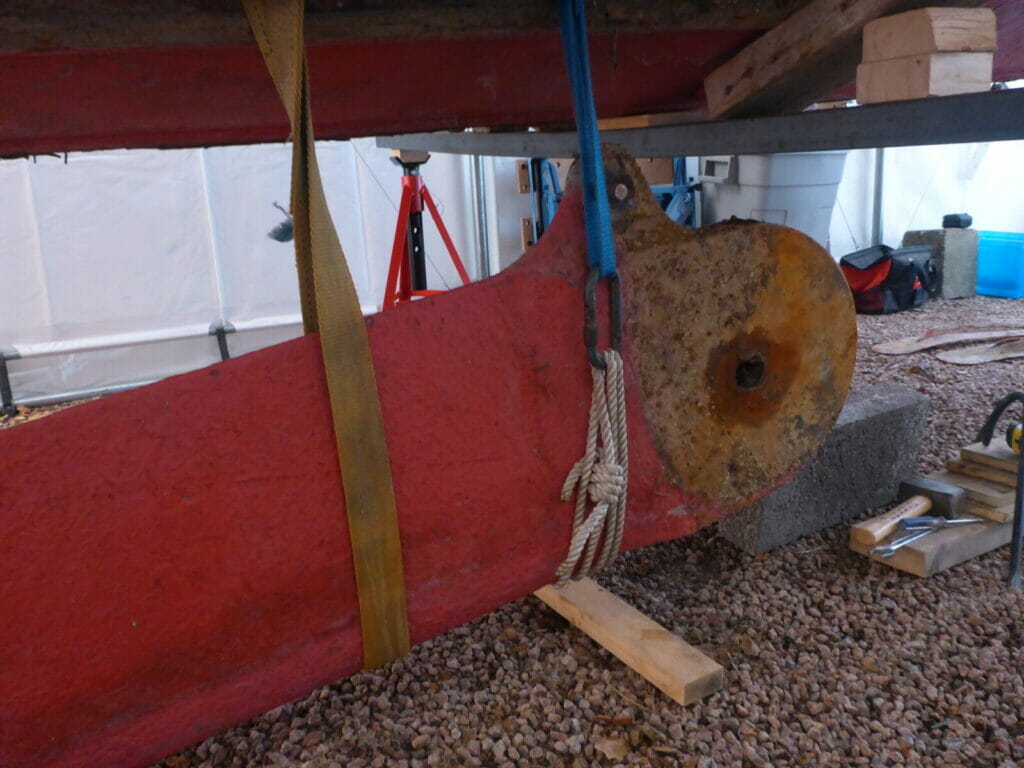
To get Bluster to the correct height for removing the keels, the jacking up process was reversed. The procedure for keel removal outlined in Technical Paper F on the AOA website was followed, and worked like a dream. It only required a ratchet strap and a couple of (retired) climbing slings and karabiners.
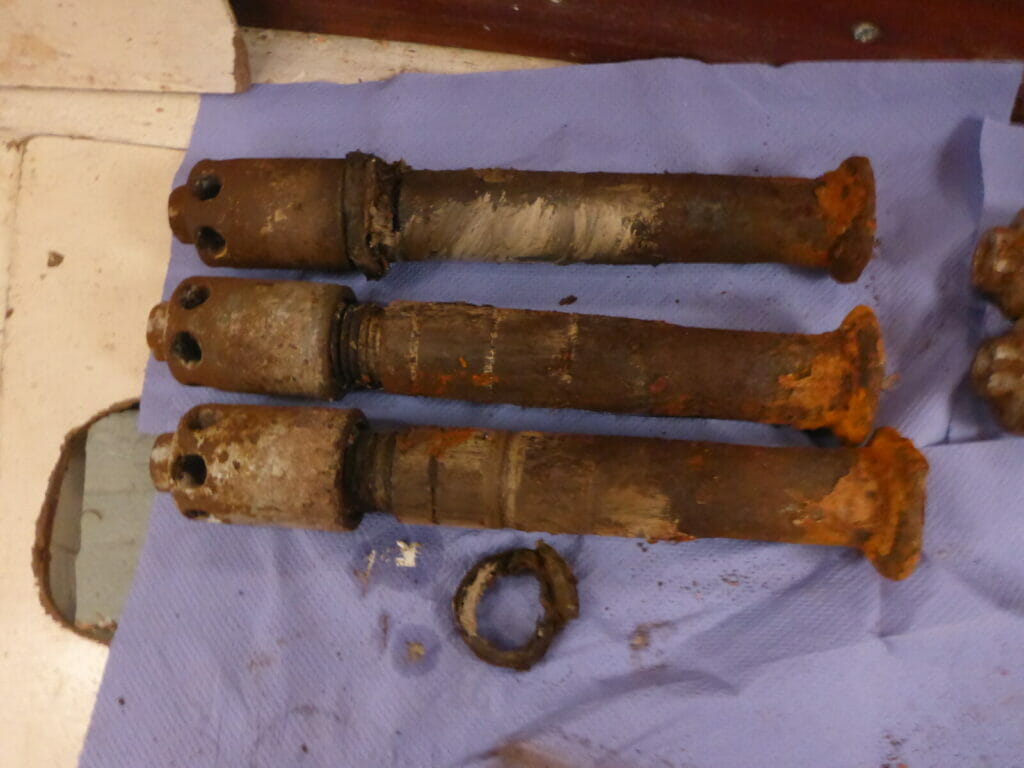
The keel bolts came out fairly easily (with drift and lump hammer), followed by the pressure plates. These were in good condition, having been replaced relatively recently. The keel bolts were well greased but corroded where exposed in the keelbox.
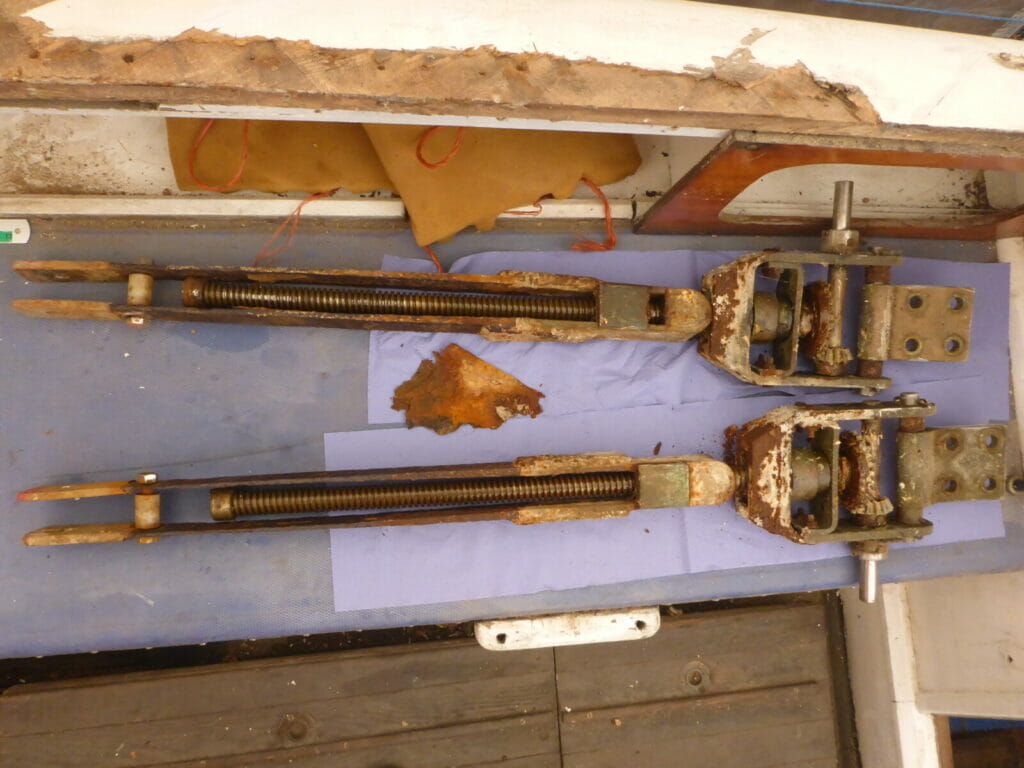
Having got the keels out, the lifting mechanisms were unbolted. It appeared that this keel service was just in time, as the stirrup steelwork was very corroded, especially just above the keels, and one leg was almost rusted through.
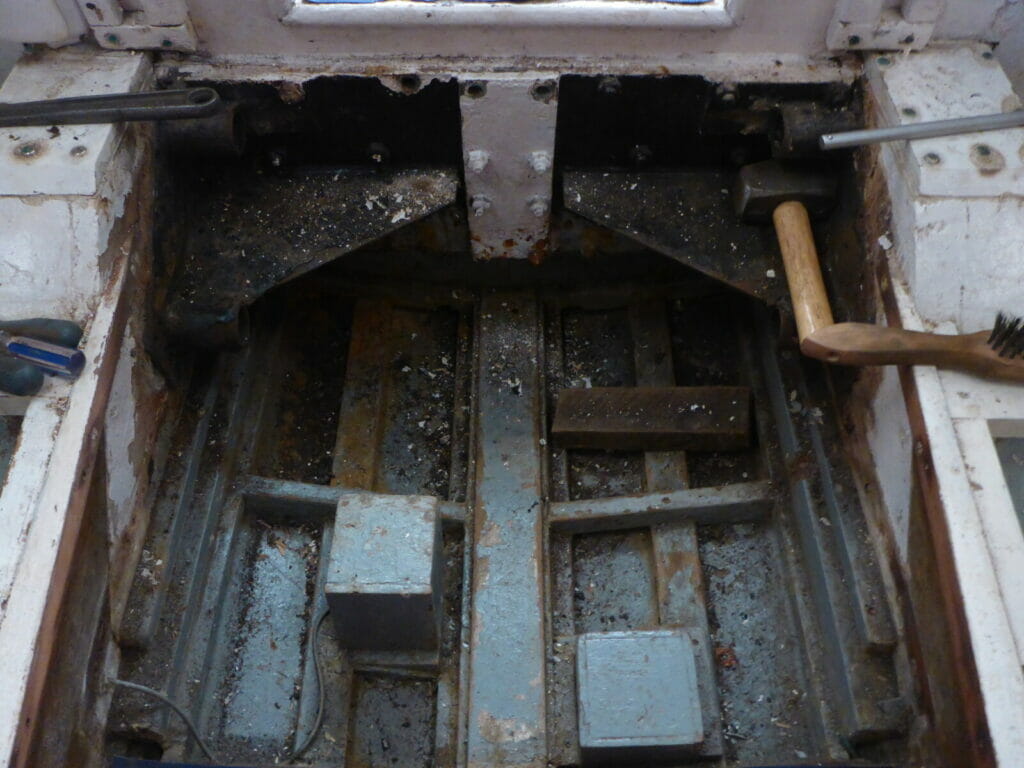
A start was then made on removing all the bolts holding in the keel support structures. About half of the bolts through the keelboxes turned when trying to remove the nuts and had to be cut off and then punched out. However, the 1/2 inch bolts through the main bulkhead gave more trouble. The upper bolts and nuts could be unscrewed (with some force), but the lower bolts and nuts were very corroded and either did not fit a spanner or sheared off due to corrosion of the bolt within the bulkhead. However, with the use of a drill and cold chisel to remove corroded nuts, a punch, pipe wrench and trusty lump hammer they eventually all came out.
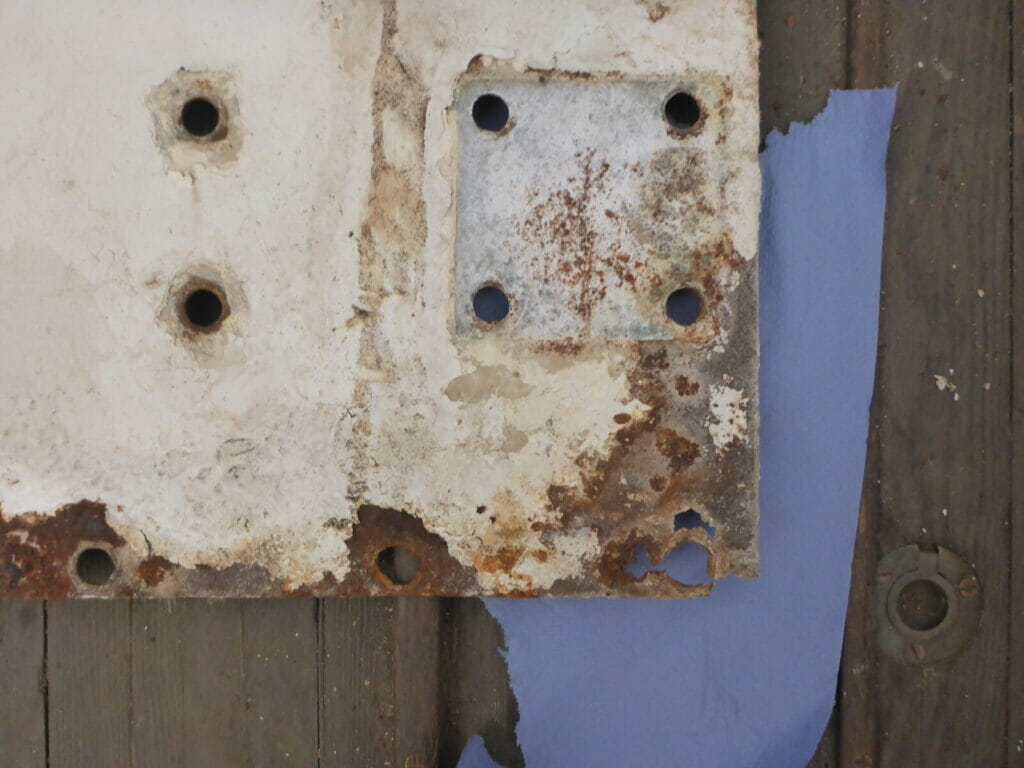
The backing plates on the aft side of the bulkhead were rusty, but only badly corroded on the lower outboard corners where bilge water collects when heeled. These need repair or replacement.
The bulkhead itself suffered some minor damage where swelled rusty bolts had been driven out, but can be repaired with some graving pieces and epoxy glue.
Having removed all the securing bolts, it only remained to remove the steelwork. This was easier said than done as, although free on the main bulkhead, the two pieces were securely glued to the keelbox sides. When they eventually came free they brought with them several chunks of plywood laminations. These inboard sections of the keelboxes will need a lot of repair, or possibly replacement by scarfing in new plywood. Delamination was probably caused by all the rusty ironwork and bolts.
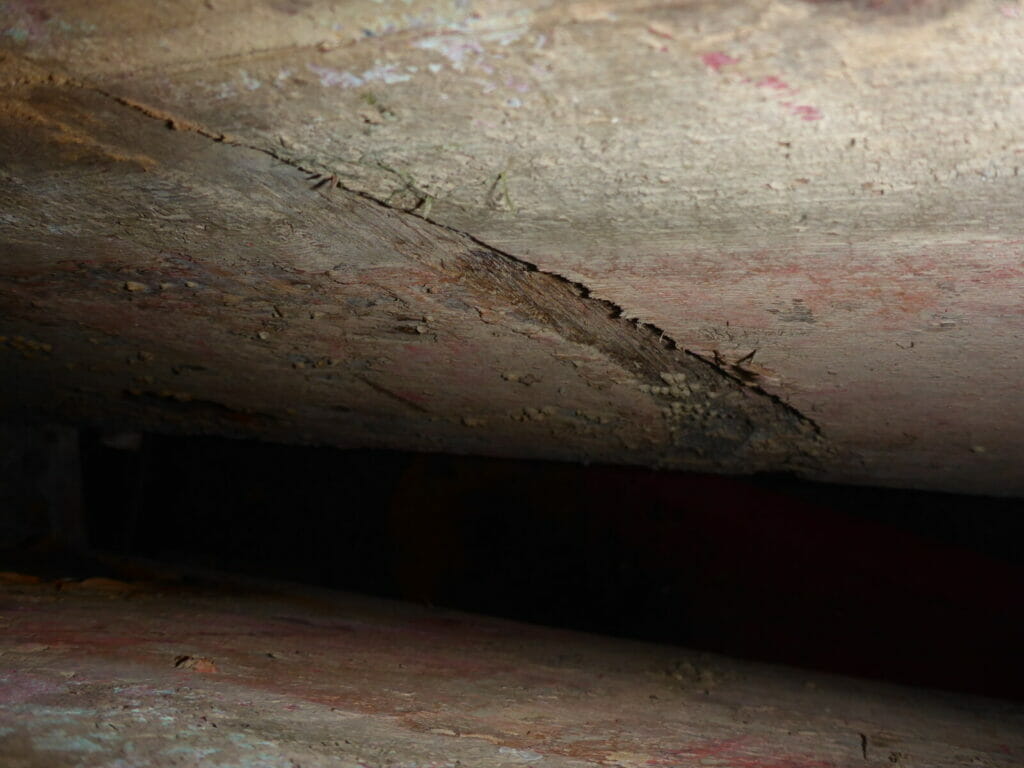
Elsewhere, the keelboxes did not appear to be in too bad condition. There was some wear close to the pivot bolts where the keels had eroded the side of the box when being raised or lowered, probably partially due to the worn keel bolts, and some splintering of the top laminate elsewhere in the keelboxes, but nothing that cannot be easily repaired.
Next to be investigated are the keel stops at the aft end of the keel boxes. This is an area that is known to be the source of considerable water ingress when heeled, and I suspect that all is not as it should be. The first job is to look at the plans and see what should be there!

Bluster Jacked-up
To pull Bluster's trailer out she had to be jacked up to 1.2 metres above the ground,
Trailer Removed and Boat Re-lowered
Having removed the trailer, Bluster was lowered again ready for keel removal.
Lowering a Keel
The keels were removed using the procedure in Technical Paper F
Keels and Pressure Plates
The remaining keel bolts and pressure plates were removed once the keels were out.
Keel Stirrups
Progressively more corrosion lower down the stirrup.
Stirrup Corrosion
Detail of stirrup corrosion, with no corrosion where stirrup was in contact with the keel.
Keel Bolts
Some corrosion where exposed to seawater.
Removing the Steelwork
The bolts through the keelboxes have been removed, and a start made on the main bulkhead bolts.
Keelbox Backing Plates813-9d203995
The backing plates in the keelboxes came out easily, fairly well rusted.
Keel Supporting Steelwork
Out at last!
Main Bulkhead Backing Plate
The lower, outboard corners of the backing plates on the aft side of the main bulkhead were corroded.
Keelbox Damage
When removing the keel support steelwork layers of plywood also came off the keelboxes.
Keelbox Wear
Laminations of the keelbox plywood worn through close to the keel pivot bolt.








Jonathan,
Are you going to get keel bolts made with the lubricating channels? If so I might also be looking for a set?
Maybe we can look into a teflon lining?
Cheers,
I am hoping to get a set of keel bolts from the AOA salvaged parts store when I go down to Norfolk later this month. However, If I do get any made I will let you know beforehand.
When chipping the rust off a keel bolt support frame I went right through one of the keel bolt tubes. Not just a simple job of re-galvanizing then! Some major re-building or replacement is necessary.
Jonathan
Jonathan,
Thank you for posting all those very interesting details and photographs of Bluster. Perhaps we should consider updating Technical Paper F, with your photos and findings? Please keep your details and photos coming, especially during the rebuild. As you know, the AOA has for sale, at very reasonable prices, many of the spare parts you might need.
Cheers,
Richard
Nick and Mike,
Thanks again for your encouragement.
To separate the steelwork from the keelboxes I used a jemmy on the main bulkhead or against the opposite keel support to generate some tension between the steel and the keelboxes, and then hammered another jemmy (flat, thin and wide steel) down between the keelbox and keel support. I think that if I had used the method described of pulling one bracket off using the other as an anchor, then the whole keelbox side would have come off.
I do not know if the keel support steelwork has been off before. It may have been, but if so, it was a long time ago. I suspect not. The backing plate inside the keelbox had mastic underneath it, so had definitely been replaced at some time.
I am still cleaning up the steelwork. Apart from the two sets of backing plates which will have to be replaced, I shall probably get the steel re-galvanized and put it back, after repairing the keelboxes. Getting it all remade in stainless steel is a lovely idea, but I am not sure that it is worth it given that there is a lot of the boat that I am not replacing. However, what do you think of putting it back with stainless bolts, and re-making the backing plate inside the keelbox out of stainless steel? Do you think that would eat the pressure plates away faster? Provided that it is kept dry I do not think that there should be any corrosion of the plates in the cabin. Stainless steel bolts through the keelbox may suffer from anaerobic corrosion, but will that be any quicker than for steel bolts?
I am currently trying to get the keel stops at the aft end of the keelboxes out. There is not a lot of steel left, and of the 8 bolts through the back end of the keelboxes, only one nut came unscrewed. For the rest, the nut and the end of the bolt fell off in a lump, having rusted through in the woodwork. Above the keel stop steelwork there is a lump of wood, curved on the underside. I am not sure whether this is fixed to the keelboxes or the steel stop. I cannot find in in any of the Atalanta plans. Any idea how it should look and what it is for?
Jonathan
Jonathan.
I suspect many owners over the years have baulked at the prospect of removing the steelwork. You’ve just shown how important it is. There’s an awful lot of trouble stored up there………………
I removed all the steelwork on A31/4, to find it in pretty good condition. I had it shot blasted and high spec paint coated. Getting the keel bolt tube frame brackets off the wooden keel boxes and bulkhead was a problem until I purchsed two large (2″ wide) steel Fox wedges from Gibb’s Tools, King Street, Aberdeen. These could be driven down between the steel frame and the wooden keel boxes with hardly any collateral damage.
A1’s support steelwork was completely shot – not even worth bothering with. Hammers, chisels and an angle grinder made short work of the remains. Rather than replace the steelwork like for like, I decided to fabricate the whole lot with a bespoke (A1’s diiferent) stainless steel set-up. Eye wateringly expensive, but, to coin a phrase, “she’s worth it”.
As to the keelband fixing screw holes – I drilled out the timber and drove wooden dowels, liberally coated with epoxy, into the resultant holes. Looked like a porcupine until they were trimmed off flush, but worked a treat.
KBO – as Churchill was often heard to say……….
Mike
Jonathan.
Wow again! You make it look and sound so easy. Both the jacking / blocking and the keel work. I know its actually easier than we might fear, once you start, and your post is very encouraging.
I am fascinated by the process of removing the keel steelwork, a job I have never had to face as the previous owner did that for me!.
Without ever having done it the step in the process that has always worried me most is removing the unbolted supporting steelwork (with the bolt tubes) from the boxes/bulkhead. You allude to some difficulty with your ‘When they eventually came free ‘. What methods did you have to use to separate the steel from the keelboxes? Whilst some repairs might be necessary everything seems to have stayed in place very well.
Are you going to repair and refit the support framework or have new fabricated? There doesn’t seem to any significant metal loss around bolt tubes in the pictures, although I appreciate that’s not the same as real life.
I also find the keel-bolt corrosion interesting, especially around the ‘heads’ of the bolt. I guess these are furthest from the grease application points.
I assume that this is not the first time that the steelwork has been out in Bluster’s 55 years? Do you know when it was last done?
Cheers
Nick