- This topic has 6 replies, 3 voices, and was last updated 11 years, 8 months ago by
 .
.
- Topic
The other job I had to do this year was to anti-foul. However my pattern of usage is likely to be to use the boat a couple of times a year with a maximum of two weeks. Perhaps I should have just applied an annual type and not got them to wash it down when it comes out of the water. However I decided to use a copper resin type. These are supposed to last multiple (up to 10) years and as reactive resins were offering a 10% discount to our association I chose them.
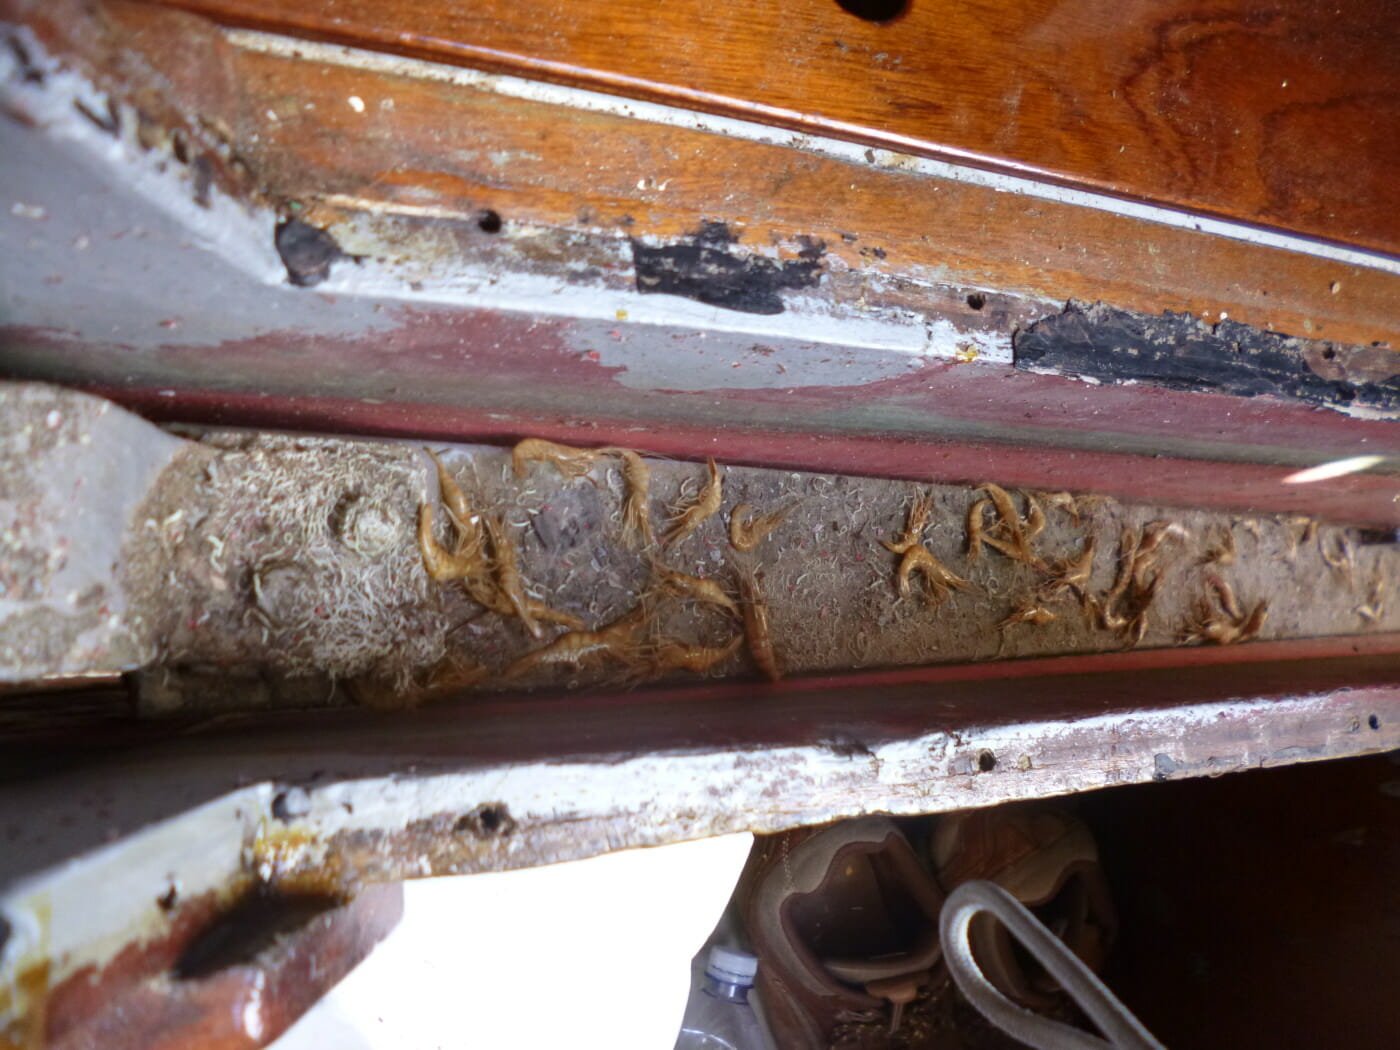
I mentioned prawns in the keel boxes I wasn’t joking. The majority of the foul is that white choral and a few small shellfish. In general the hull wasn’t too bad but this choral was present where the lifting straps would have been and the power wash hadn’t. I could feel the hull was rough in places when swimming under it before she came out.
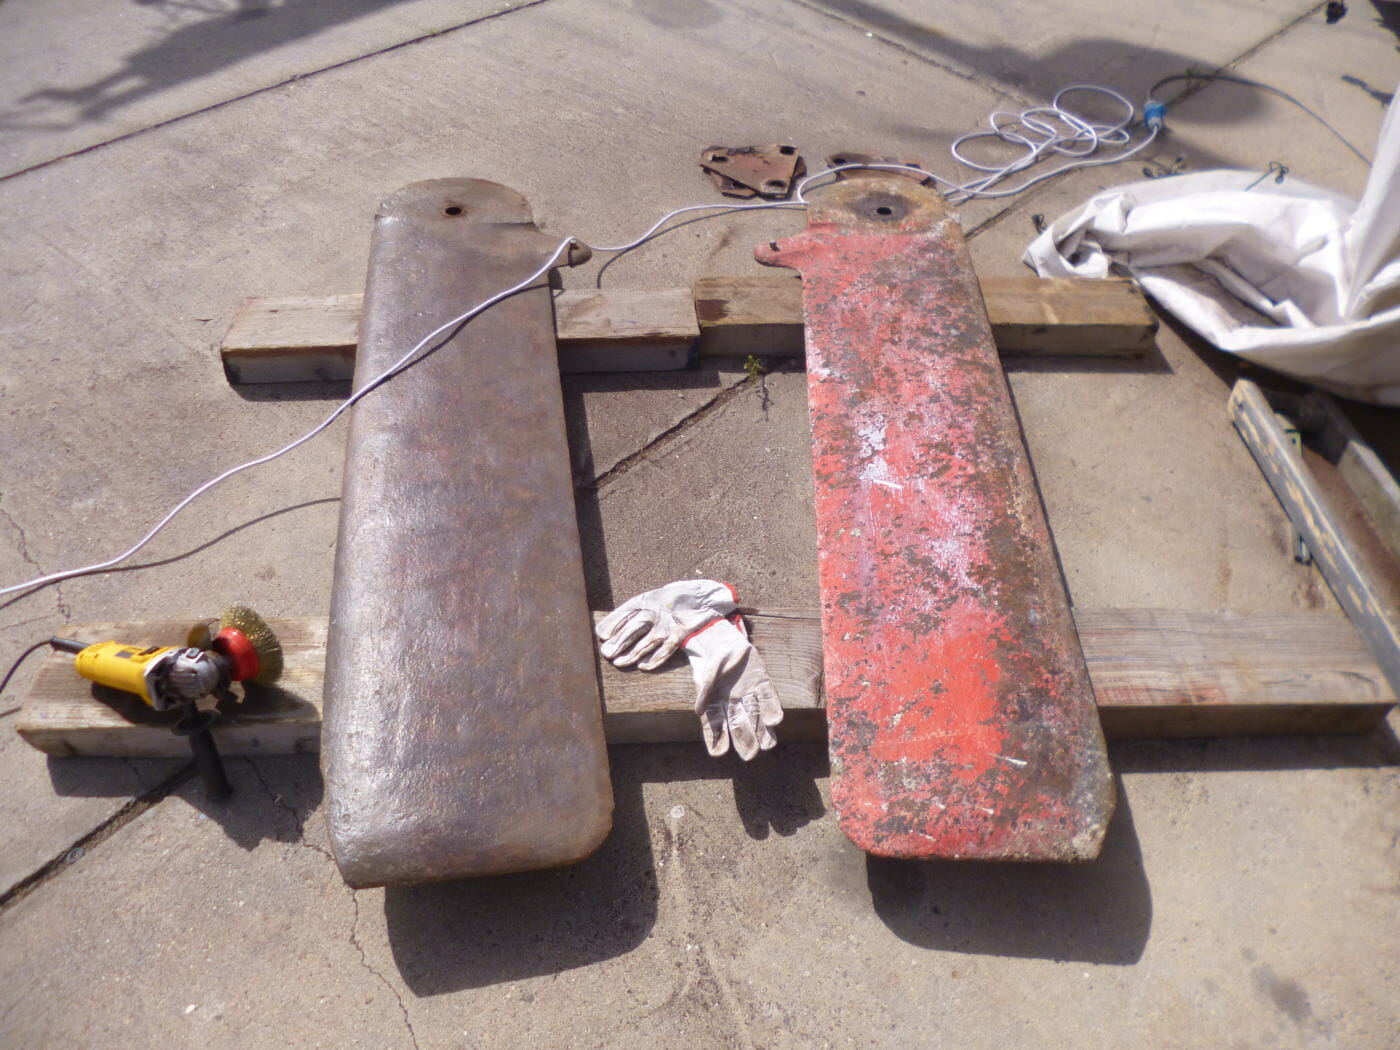
 The biggest task is to remove the keels so I could paint the keel boxes. As the keels had been power washed, removing any of the anti-foul I put on the year before, they were looking pretty untidy so it was a chance to clean these up too.
As the keels were supported at the back I was able to use the winches to lower them. I used a rope to hold them back to account for the fact the winches pull them slightly forward. The difficulty is that the winches cannot lower them far enough to undo the bolt that holds both the baffle (as seen above) and clamps the winch to the keel. In hindsight I would undo this before lowing but use a rope to hold the clamp together.
Needless to say this is dangerous and utmost care must be taken. Out from under the boat it would probably take 4 people to lift one. Under the boat you rely on levers, winches. blocks and tackle. It took considerable effort to flip one to paint both sides.
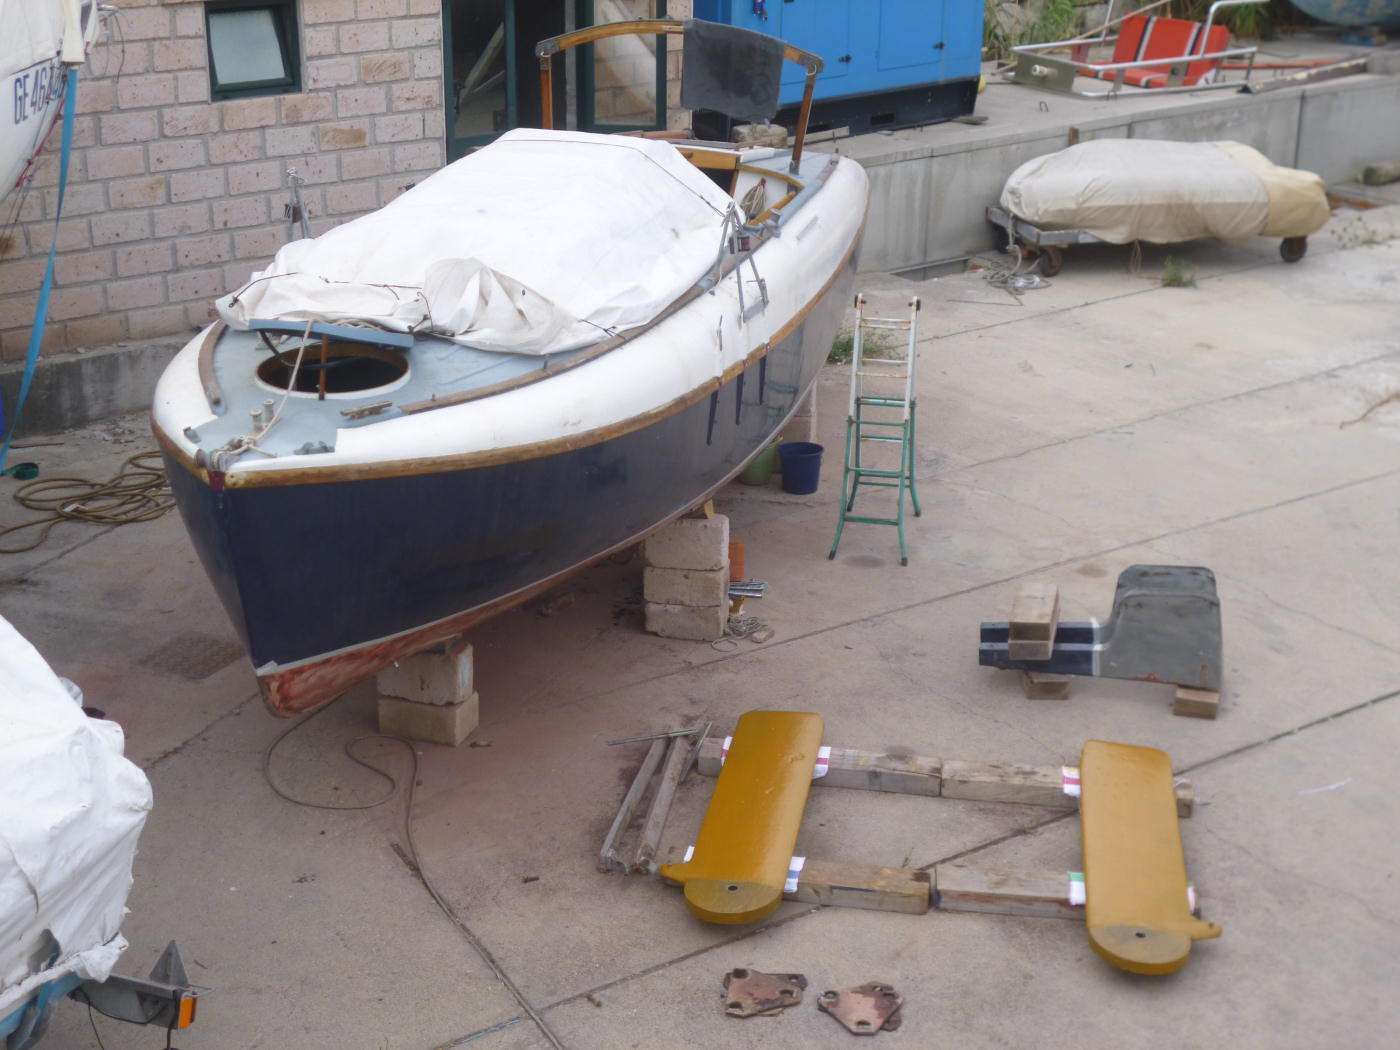
Once I had lowered the keels and lay them flat I was able to use a forklift to move them out from under the boat. I used an angle grinder with a wire wheel to clean the old paint off. In this picture you can see the inside of the two keels the other sides have larger pitting.Reactive Resins have a metal primer called Armourguard which comes in a fetching mustard colour. Following this I used their filler to smooth the pitting. In the following picture you can see a bit of a chunk missing from the left keel. All of their paints are mixed by weight so I bought a digital kitchen scale as suggested, it cost me 24 Euros. I applied the primer using a brush and the filler using an 6″ wide scraper. The filler sands easily but I was using an electric sander to do it. I am not sure how easily it would apply to the hull to give a smoother finish but I think it would probably be worth it. In the end I probably used less than I should have and should have given a thicker overall coating.After sanding back the hull to remove what remained of he old anti-foul I coated it in epoxy resin. The hull has been “west-systemed”. I used the new coat of resin to bind any loose material I hadn’t removed with the sander as well as cover any minor scratches. I was then to use a primer-sealer called safeguard-ps.At this stage I made a big mistake and mixed the safeguard-ps hardener with Synergy anti-foul resin and painted it on the hull. The result was a waxy coating that you could scrape off with your fingernail. Obviously this had to come off. I contacted Reactive Resins (RR) and got a prompt response but they had little experience of such daftness (my words not theirs). But suggested some solvents. As luck would have it we had a few rain showers that morning and I could see that water would get under this stuff and soften it. So I borrowed the pressure washer and gave it a good blast and spent the rest of the day under the boat with a scouring pad and some soapy water. This managed to get rid of it.
I then mixed the safeguard I had left (limited by hardener) and applied it. This is described as low viscosity primer, but for me it didn’t have a satisfying application. Feeling more of a wash than a coat. I had predicted the use of 1 litre and even with all the hardener I doubt I would have had enough. Again I spoke to RR and they suggested any two pack epoxy tie coat or matt primer would do. The marina had a Hempel primer and I used that. This gave more of a solid feel of application. BTW I believe RR have replaced the use of safeguard so I am not sure what the new stuff is like.
Finally the copper anti-foul. Probably the biggest issue I was facing was the heat. Possibly up to 30 degrees and certainly hot in the sun. What I think is needed is a supply of small buckets for mixing. Roller trays are cheap enough at Euro 1.20 but not good for mixing. Obviously most of this stuff was one use only. The small rollers I had available to me were too long in the pile and took some convincing to distribute evenly but could be persuaded. I found that the application with a brush meant the stuff that wicked up into the brush would start going off. This made the brush unusable and you didn’t want to be mixing stuff that has gone off with stuff that hasn’t yet. The rollers were the easiest and most consistent way of applying the stuff.
The mix looks very much like hot chocolate and with the rollers does give a nice consistent coverage. I found I could make a reasonable sized batch and leave the pot in a cool place (NB shed behind the boat) and pour smaller amounts into the roller tray without worrying too much about it going off. But for me mixing 1 litre batches worked best.
The best time to apply the stuff was in the evening when the mosquitoes were at their best.
This picture is after a couple of coats.While I was doing this a Dutch boat came in for winter lay-up it had been given a copper anti-foul when it was new 3 years ago. It had been in the water since then. They routinely power wash when they pull a boat out of the water though you can see where the lifting straps were. It all looked rather clean including under the straps, however there was some foul in the bow thruster. Another boat I met who had the copper treatment had asked them not to spray but instead just went around with a scraper and cleaned up by hand.
The other thing that was interesting about the Dutch boat was wear and tear on the coating. There was scratches where the anchor had hit the bow and the coating looked a bit thin on the rudder behind the prop. I wonder how easy it would be to repair?


- You must be logged in to reply to this topic.